Imagine growing fresh herbs year-round — no soil, no garden, no mess?
That’s exactly what hydroponic herb growing enables you to do.
Hydroponics is the technique of growing plants in a nutrient solution instead of soil. The roots rest in a nutrient-filled liquid that feeds the plant directly. The result? Faster growth, less fuss, and herbs that are always fresh and at the ready.
City apartments, small kitchens, basement setups — they mean nothing. If you have a bit of space and a little light, you can grow flourishing hydroponic herbs.
More and more people are making this switch each year. And once you witness how quickly herbs grow without soil, it’s difficult to go back.
This article shares 5 simple hydroponic herbs growing methods that are suitable for both beginners and experienced growers. You’ll see step by step how each method works so you know exactly what to do, what you need, and what to expect.
Let’s get started.
The Why — Why Should You Grow Herbs Hydroponically?
Before you jump into the methods, it’s helpful to know why hydroponics is worth your money and time.
Here’s a quick side-by-side comparison:
| Factor | Soil Growing | Hydroponic Growing |
|---|---|---|
| Growth speed | Normal | 30–50% faster |
| Water usage | High | Up to 90% less |
| Space needed | More | Much less |
| Pest problems | Common | Rare |
| Year-round growing | Weather dependent | Always possible |
| Setup cost | Low | Low to moderate |
The numbers speak for themselves. Hydroponic herbs grow faster, consume less water, and yield more per square foot of space. That’s a win on every level.
So let’s move on to the five methods.
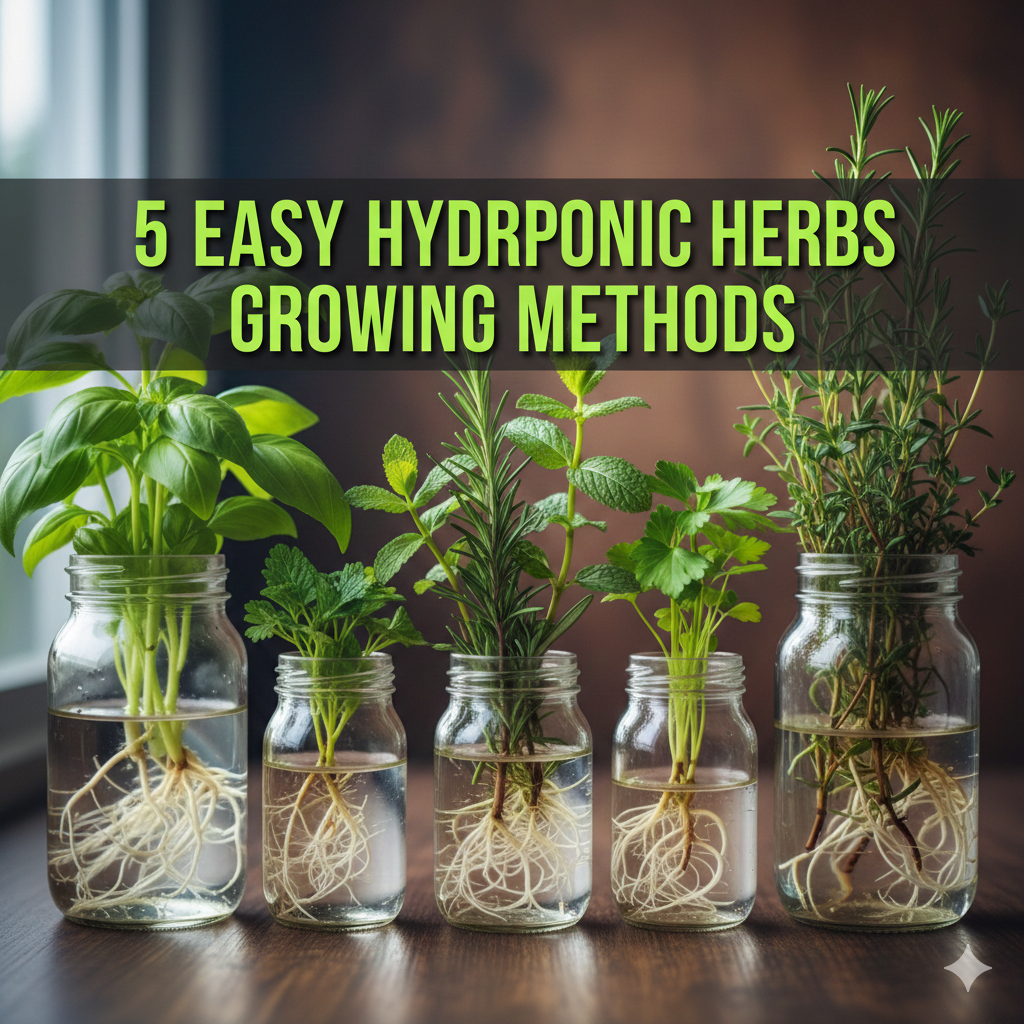
Method 1: The Kratky Method — The Easiest Way to Grow Herbs in Water
If you want to start growing hydroponic herbs today with almost zero setup, the Kratky method is your best friend.
It was developed by Dr. Bernard Kratky at the University of Hawaii. The idea is beautifully simple. You hang a plant over a container of nutrient water. The roots hang down into the water. As the plant drinks the water down, an air gap develops above the water line. That air gap gives the roots oxygen — which they need just as much as nutrients.
No pumps. No electricity. No moving parts. Just water, nutrients, and a jar.
What You Need to Get Started
- A mason jar or opaque container (dark-colored to prevent algae)
- Net pots (small mesh cups that secure the plant)
- Hydroponic nutrient solution
- Growing medium (rockwool cubes or hydroton clay pebbles)
- Herb seedlings or seeds
Herbs That Work Well in the Kratky Method
| Herb | Growth Rate | Difficulty |
|---|---|---|
| Lettuce-leaf basil | Fast | Very easy |
| Mint | Fast | Very easy |
| Cilantro | Moderate | Easy |
| Chives | Moderate | Easy |
| Parsley | Moderate | Easy |
Step-by-Step Setup
- Fill your jar with water and nutrient solution (follow the ratio on the label).
- Position the net pot in the mouth of the jar so that its bottom is just above the water level.
- Fill with growing medium and plant your herb seedling or seed.
- Allow the bottom of the net pot to just barely touch the water — enough to wick up some moisture.
- Position in a location that receives 6–8 hours of light per day.
- Let the air gap form naturally as the water level goes down. Do not top up until the level is very low.
That’s it. The Kratky method is about as close as hydroponic growing gets to “set it and forget it.” It’s ideal for beginners starting their journey with hydroponic herbs.
Method 2: Deep Water Culture (DWC) — Quick, Dependable, and Perfect for Bigger Harvests
Deep Water Culture, or DWC, is one of the most widely used hydroponic growing methods in the world — and there are good reasons for that.
It’s fast. It’s reliable. And it scales up easily, from a single jar on your kitchen counter to a full indoor setup with multiple plants.
In DWC, the plant roots dangle directly in a reservoir of oxygenated, nutrient-dense water. An air pump keeps air bubbles flowing through the water at all times. Those bubbles provide oxygen to the roots 24/7.
It’s this continuous supply of oxygen that gives DWC its power. Roots fueled with plenty of oxygen absorb nutrients more quickly. And the quicker nutrients are absorbed, the faster plants grow.
DWC vs. Kratky — What’s the Difference?
| Feature | Kratky | DWC |
|---|---|---|
| Air pump needed | No | Yes |
| Electricity required | No | Yes |
| Growth speed | Fast | Faster |
| Best for | Beginners | Intermediate growers |
| Maintenance | Very low | Low to moderate |
What You Need for a DWC Setup
- A bucket or reservoir (5-gallon buckets work well)
- Air pump and air stone
- Net pots and lids
- Hydroponic nutrients
- pH testing kit
- Growing medium (hydroton or rockwool)
Setting Up Your DWC System
- Fill your bucket with water and add hydroponic nutrients according to the instructions.
- Test the pH. Herbs prefer a pH between 5.5 and 6.5. Adjust if needed using pH Up or pH Down solutions.
- Place the air stone at the bottom of the bucket and connect it to the air pump.
- Cut holes in the lid for your net pots.
- Place seedlings in net pots filled with growing medium.
- Adjust the water level so the bottom of the net pots barely touches the water.
- Turn on the air pump and place under your grow light or near a bright window.
Best Herbs for DWC
DWC systems are ideal for basil, mint, oregano, thyme, and dill. These herbs grow much faster than they would in soil, making DWC one of the most rewarding hydroponic herbs methods for anyone who loves cooking with fresh ingredients.
Method 3: Nutrient Film Technique (NFT) — A Flowing System for Serious Herb Growers
The Nutrient Film Technique — NFT for short — is a more sophisticated step up. But don’t let that scare you off. Once it’s set up, it pretty much runs itself.
Here’s how it works. A thin, continuous “film” of nutrient solution flows through a slightly tilted channel or tube. Plant roots rest in the channel, their lower portions touching the flowing water while the upper part stays exposed to air. This allows roots to receive both nutrients and oxygen at the same time.
The solution drains from a reservoir at the bottom, gets pumped up to the top of the channel, flows past the roots, and drains back into the reservoir. It’s a closed loop.
Why NFT Works So Well for Herbs
Herbs are lightweight plants. They don’t require a lot of support from soil. NFT channels keep them well fed, well oxygenated, and consistently hydrated — everything a fast-growing herb needs.
NFT System at a Glance
| Component | Purpose |
|---|---|
| Reservoir | Holds the nutrient solution |
| Water pump | Moves solution to the top |
| Channel/tube | Directs nutrient solution past roots |
| Net pots | Hold plant in place |
| Return pipe | Drains solution back to reservoir |
Setting Up a Basic NFT System
- Set up your channel at a slight angle — about a 1–2% slope so water flows downward naturally.
- Fill the reservoir with water and nutrient solution.
- Connect the pump to move water from the reservoir up to the top of the channel.
- Insert net pots with seedlings into holes along the top of the channel.
- Turn on the pump and check that a thin stream flows past all the roots.
- Check nutrient levels and pH every 2–3 days.
Best Herbs for NFT Systems
| Herb | Why It Works Well |
|---|---|
| Basil | Fast-growing, loves consistent water |
| Spearmint | Thrives in flowing water |
| Watercress | Naturally grows near water |
| Lemon Balm | Loves moisture and good airflow |
| Tarragon | Grows vigorously in NFT channels |
NFT is a great choice for those who want to grow hydroponic herbs on a slightly larger scale — picture a counter-length channel that lets you produce multiple herb varieties all at once.
Method 4: Wick System Hydroponics — The Most Budget-Friendly Method
Not all hydroponic systems require pumps, timers, or equipment. The wick system proves that.
This is the most low-tech method of hydroponic growing there is. It works on a very simple principle: capillary action. A wick — made from cotton rope, felt, or even a strip of fabric — pulls nutrient water up from a reservoir into the growing medium where the plant roots sit.
Think of it like a candle wick drawing wax upward. Same idea.
No electricity. No pump. No moving parts. Just a wick and a container.
Who Is the Wick System Best For?
- Complete beginners who want a risk-free starting point
- Kids learning about hydroponics for the first time
- Anyone growing a small herb collection on a tight budget
- Frequent travelers who need a low-maintenance setup
What You Need for a Wick System
- Two containers (one for the reservoir, one for the plant)
- Cotton rope or felt strips for the wick
- Growing medium (perlite, coco coir, or vermiculite work best)
- Hydroponic nutrient solution
- Herb seedlings
How to Build a Simple Wick System
- Fill the bottom container (reservoir) with nutrient water.
- Thread the wick through the bottom of the upper container so one end hangs into the nutrient water and the other end sits among the growing medium.
- Fill the upper container with your growing medium.
- Plant your herb seedling.
- Place near a bright window or under a grow light.
- Refill the reservoir when it runs low.
Wick System Limitations
The wick system has one key weakness: it’s slow. The wick can only deliver so much water at a time. That means it works best for herbs that don’t need a lot of water.
| Works Well | Not Recommended |
|---|---|
| Herbs | Tomatoes |
| Lettuce | Cucumbers |
| Chives | Peppers |
| Thyme | Large fruiting plants |
The wick system is perfectly viable for hydroponic herbs. Thyme, chives, oregano, and marjoram all respond nicely to this approach.
Method 5: Aeroponics — The Most Advanced and Fastest-Growing Method
Aeroponics is the most high-tech method on this list. But it’s also the most spectacular.
Aeroponic systems suspend plant roots in open air, rather than growing them in water or growing medium. Nozzles mist the roots with nutrient solution at regular intervals — generally every few minutes. This maximally exposes the roots to oxygen between misting cycles, driving extremely fast growth.
Aeroponic plants have been shown to grow 2–3 times faster than soil-grown plants. NASA has even used aeroponics to research growing food in space.
How an Aeroponic System Works
- Plants are placed in net pots inside a sealed chamber or tower.
- Roots hang freely in the air inside the chamber.
- A timer-controlled pump triggers misting nozzles every few minutes.
- Roots absorb nutrients from the mist before drying slightly between cycles.
- The drying period between misting maximizes oxygen absorption.
Aeroponic System Comparison
| Feature | Basic Aeroponics | High-Pressure Aeroponics |
|---|---|---|
| Mist droplet size | Larger | Ultra-fine |
| Nutrient absorption | Good | Excellent |
| Setup cost | Moderate | High |
| Growth speed | Very fast | Fastest possible |
| Best for | Home growers | Commercial operations |
For home growers, basic aeroponic tower gardens are more widely available than they used to be. Companies such as Tower Garden have brought aeroponic growing into everyday homes.
Best Herbs for Aeroponics
Basil excels in aeroponic systems. So do mint, cilantro, dill, parsley, and sage. These herbs grow full, bushy, and incredibly fragrant because roots receive maximum oxygen.
If you want to grow hydroponic herbs at the most advanced level, aeroponics is the method to aim for.
Choosing the Right Method for You
Now that you’ve learned all five methods, how do you choose the right one?
Here’s a simple decision guide:
| Your Situation | Best Method |
|---|---|
| Complete beginner, zero budget | Wick System |
| Beginner, prefer passive growing | Kratky Method |
| Want faster growth, okay with a pump | Deep Water Culture |
| Want to grow multiple herbs in a row | Nutrient Film Technique |
| Serious grower, want maximum results | Aeroponics |
Start where you’re comfortable. Many growers initially start with Kratky or the wick system and eventually move into DWC or NFT. There’s no wrong starting point.
What Nutrients Do Hydroponic Herbs Actually Need?
Soil provides nutrients naturally. In hydroponics, you deliver them directly through the water.
Most hydroponic nutrient solutions cover three key elements — often called the NPK ratio:
- Nitrogen (N) — Stimulates leafy, green growth. Critical for herbs.
- Phosphorus (P) — Promotes root development and flowering.
- Potassium (K) — Enhances overall plant health and disease resistance.
For herbs specifically, you want a solution that is on the higher end of nitrogen. Herbs are grown primarily for their leaves, and nitrogen is what drives lush leaf production.
For more in-depth guidance on herb varieties, growing conditions, and natural remedies, The Herb Garden is a fantastic resource worth bookmarking.
Recommended Nutrient Levels for Common Hydroponic Herbs
| Herb | EC Level (nutrient strength) | Ideal pH |
|---|---|---|
| Basil | 1.0 – 1.6 | 5.5 – 6.5 |
| Mint | 2.0 – 2.4 | 5.5 – 6.0 |
| Parsley | 0.8 – 1.8 | 5.5 – 6.0 |
| Cilantro | 1.4 – 1.8 | 6.0 – 6.5 |
| Thyme | 0.8 – 1.6 | 5.5 – 7.0 |
EC stands for Electrical Conductivity — it’s simply a measure of how strong your nutrient solution is. An inexpensive EC meter from any garden supply store will tell you exactly where your levels stand.
Light, Temperature, and the Other Ingredients That Make Herbs Thrive
Getting the method right is important. But your herbs also need the right environment to reach their full potential.
Light
Most herbs need 14–16 hours of light per day in a hydroponic setup. Natural window light typically isn’t sufficient unless you live in a very sunny location.
LED grow lights are the most energy-efficient option. Full-spectrum LEDs that include both blue light (for leaf growth) and red light (for flowering) are ideal. The University of Missouri Extension offers helpful guidance on using artificial lighting for indoor plant growing.
Temperature
Most herbs are happy between 65°F and 75°F (18°C to 24°C). Too cold slows growth. Too hot leads to wilting and poor flavor.
Water Temperature
Keep the nutrient solution between 65°F and 70°F (18°C to 21°C). Warmer water holds less oxygen, which can stress roots and make them more susceptible to disease.
Air Circulation
Even a small fan running for a couple of hours a day helps strengthen herb stems, improves air circulation, and reduces the risk of mold or fungal problems.
The 10 Best Hydroponic Herbs — At a Glance
| Herb | Best Method | Time to Harvest | Flavor Benefit |
|---|---|---|---|
| Basil | DWC, Aeroponics | 3–4 weeks | Stronger, more aromatic |
| Mint | Kratky, DWC | 3–4 weeks | Very vigorous growth |
| Cilantro | NFT, Kratky | 3–4 weeks | Fresh, consistent flavor |
| Parsley | DWC, Wick | 4–6 weeks | Lush and full |
| Chives | Kratky, Wick | 3–4 weeks | Mild, steady production |
| Oregano | DWC, NFT | 4–6 weeks | More concentrated oils |
| Thyme | Wick, Kratky | 4–6 weeks | Hardy, low maintenance |
| Dill | DWC, Aeroponics | 3–5 weeks | Feathery, fragrant |
| Sage | NFT, DWC | 5–6 weeks | Rich flavor profile |
| Lemon Balm | Kratky, DWC | 4–5 weeks | Calming, fragrant |
Wrapping It Up — Your Hydroponic Herb Garden Is Closer Than You Think
Growing hydroponic herbs isn’t complicated. It doesn’t need a greenhouse, a large budget, or any gardening experience.
It takes the right method, some setup time, and a willingness to try something new.
The five methods in this article cover every level of gardener:
- Kratky — Passive, simple, perfect for beginners
- Deep Water Culture — Fast-growing and reliable
- Nutrient Film Technique — Great for growing multiple herbs at once
- Wick System — The most budget-friendly starting point
- Aeroponics — The fastest and most advanced option
Pick one. Set it up this week. In a few weeks, you’ll be snipping fresh basil, mint, or parsley directly from your own hydroponic system — and wondering why you didn’t start sooner.
Fresh herbs at home. No soil. No season. No limits.
Frequently Asked Questions (FAQs)
Q1: What are hydroponic herbs? Hydroponic herbs are herbs grown in a nutrient-rich water solution instead of soil. The roots absorb water and nutrients directly, resulting in faster growth and year-round harvests regardless of outdoor conditions.
Q2: Which hydroponic method is best for absolute beginners? Both the Kratky method and the wick system are great starting points. They need no electricity, no pumps, and minimal maintenance. You can set one up in under 30 minutes with basic supplies.
Q3: Are hydroponic herbs tastier than soil-grown herbs? Many growers say hydroponic herbs taste just as good — and often more intense — than their soil-grown counterparts. The plant receives precisely the nutrients it needs, leading to richer essential oil development.
Q4: What are the startup costs for a hydroponic herb garden? A simple Kratky or wick setup can cost as little as $10–$20 using mason jars and basic materials. A DWC or NFT system typically runs $50–$150 for a beginner kit. Aeroponic towers range from $150 to $600 depending on the brand and size.
Q5: Do hydroponic herbs need sunlight? Natural sunlight works well if you have a very bright south-facing window. LED grow lights are beneficial in most indoor setups, as they provide the full spectrum of light herbs need and can run for 14–16 hours a day without a large electricity cost.
Q6: How often do I need to change the nutrient water? For Kratky and wick systems, top up the water as needed and do a full water change every 1–2 weeks. For DWC and NFT systems, check nutrient levels and pH every 2–3 days and do a full reservoir change every 1–2 weeks to prevent nutrient buildup.
Q7: Do I need special equipment to grow hydroponic herbs? No. The wick system and Kratky method require only containers, water, a basic nutrient solution, and light. No specialized equipment is needed to start growing hydroponic herbs at home.
Q8: Is growing herbs hydroponically safe and organic? Hydroponic herbs are safe to eat. Whether they’re organic depends on the nutrients you use. Certified organic hydroponic nutrients are widely available and produce herbs that meet organic standards. Always use food-safe containers and clean your system regularly to keep everything healthy.