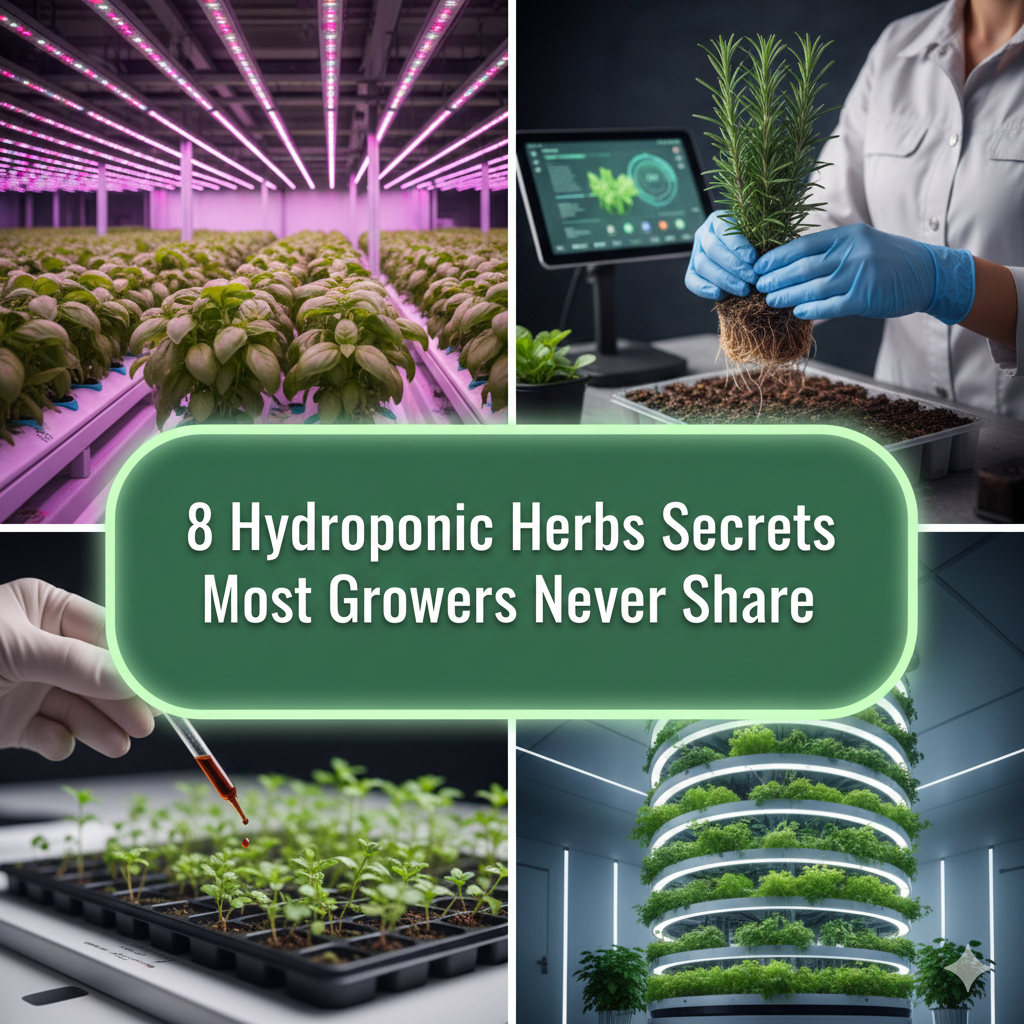
The idea of growing herbs without dirt may seem like something out of a science fiction movie. But hydroponics is real, it works, and it produces results that most soil gardens cannot compete with.
The problem? The majority of beginners hardly scratch the surface. They install a basic system, put in a few seeds, and wonder why their basil is leggy or their mint tastes bland.
The truth is, there are certain techniques that seasoned growers rely on — techniques that rarely make it into guides for newcomers. These methods create huge gains in flavor, yield, and plant health.
These 8 pro-level hydroponic herbs techniques will have you growing like an expert even if it’s your first time!
Why Hydroponics is Great for Growing Herbs
Before listing the techniques, it’s helpful to know why hydroponics and herbs are such a powerful match.
When you grow herbs in soil, the plant has to use a lot of energy hunting for nutrients and water. In a hydroponic system, the roots receive everything directly. That means the plant focuses its energy on growth and flavor instead.
Hydroponically grown herbs grow 30–50% faster than soil-cultivated plants. They also tend to have bolder aromas and more intense flavors, since they’re under less stress.
Now let’s get into the secrets.
Technique #1 — Tailor Your System to the Herb, Not the Other Way Around
Most beginners just choose one hydroponic system and attempt to grow every herb in it. That is one of the worst mistakes you could make.
Each herb has its own root system and water requirements. Matching the system to the herb is a game-changer.
What System Works Best For Which Herb
| Herb | Best Hydroponic System | Why It Works |
|---|---|---|
| Basil | Deep Water Culture (DWC) | Loves constant moisture and warm roots |
| Mint | Nutrient Film Technique (NFT) | Handles aggressive growth well |
| Cilantro | Kratky Method | Prefers dry periods between waterings |
| Thyme | Ebb & Flow | Drought-tolerant, needs drainage |
| Parsley | DWC or Ebb & Flow | Heavy feeder, needs rich nutrient flow |
| Chives | NFT | Thin roots thrive in shallow channels |
| Oregano | Kratky or Wick System | Low maintenance, doesn’t like wet feet |
| Rosemary | Aeroponic | Loves oxygen at the roots |
Once you adjust the system to match the herb’s natural preferences, everything falls into a rhythm — quicker germination, better growth rate, fewer issues.
Technique #2 — The Root Zone Temperature Hack
The vast majority of growers obsess over air temperature. They neglect one of the most critical factors: root zone temperature.
Warm nutrient solution holds less oxygen. This causes root rot and slow growth. Too cold, and the roots go into shock and stop taking up nutrients.
Most hydroponic herbs are happiest in the 65°F to 72°F (18°C–22°C) range.
How to Control Root Zone Temperature
- If your reservoir heats up in summer, use a water chiller
- Coat your reservoir in reflective insulation to block light and heat
- During cold winter months, add a small aquarium heater
- Do not place the reservoir in direct sunlight or near heating vents
Just changing this one thing can double your growth rate. It sounds simple, but very few beginner guides even talk about it.
Technique #3 — Natural But Improved Light Scheduling
Not everything loves 24 hours of light. In fact, unending light may stress many plants and slow their growth. What they require is a clever light cycle that fools them into producing more of what you want.
Secret Light Schedules for Common Herbs
Basil: 16 hours on / 8 hours off Basil loves the sun. Extended light boosts leaf production without triggering early flowering.
Cilantro: 14 hours on / 10 hours off Cilantro bolts (goes to seed) quickly under extreme long-day conditions. A shorter cycle prolongs its leafy phase.
Mint: 16 hours on / 8 hours off Mint is aggressive and tolerates long light cycles just fine. More light means more growth.
Rosemary & Thyme: 14–16 hours on / 8–10 hours off These Mediterranean herbs like long days, but prefer moderate intensity — not blazing brightness.
Use Full-Spectrum LED Lights
Grow lights are not all created equal. Full-spectrum LEDs that include red (630–660nm) and blue (450–470nm) wavelengths provide herbs precisely what they need for leaf growth and root expansion.
The blue spectrum fosters compact, bushy growth. The red spectrum enhances flavor and oil production. Combined, they are more effective than either one on its own.
Technique #4 — The Nutrient Ratio Secret That Boosts Flavor
Here’s something that most beginner articles leave out completely: not all nutrients are about growth.
The big three nutrients — nitrogen (N), phosphorus (P), and potassium (K) — each have different functions.
- Nitrogen pushes leafy, green growth
- Phosphorus supports roots and flower development
- Potassium enhances taste, scent, and plant strength
For culinary herbs, taste is the number one priority. This means adjusting your NPK ratio at different stages of growth.
A Two-Stage Nutrient Strategy for Maximum Herb Flavor
Stage 1 — Early Growth (Weeks 1–3) Use a high nitrogen formula. Something like a 3-1-2 NPK ratio. This builds a bushy green plant quickly.
Stage 2 — Maturity (Week 4 and beyond) Transition to a high potassium formula. Something like a 1-1-3 NPK ratio. This enhances flavor by concentrating essential oils.
This two-stage approach is used by commercial herb growers but rarely mentioned in home gardening guides. For more in-depth herb growing tips and inspiration, The Herb Garden is a fantastic resource worth bookmarking.
Keep EC (Electrical Conductivity) in Range
EC measures how concentrated your nutrient solution is. Too high, and the roots burn. Too low, and the plants starve.
| Herb | Ideal EC Range (mS/cm) |
|---|---|
| Basil | 1.0 – 1.6 |
| Mint | 2.0 – 3.0 |
| Cilantro | 1.3 – 1.8 |
| Rosemary | 1.0 – 1.6 |
| Thyme | 0.8 – 1.6 |
| Parsley | 1.8 – 2.2 |
| Chives | 1.8 – 2.2 |
| Oregano | 1.5 – 2.0 |
Check EC every 2–3 days and adjust as needed.
Technique #5 — Harvest Strategically to Force Bushier Growth
This is one of the most powerful — and most ignored — techniques in hydroponic herbs growing.
Most people harvest from the top of the plant. That’s the wrong approach.
When you cut the main growing tip, the plant responds by pushing growth into the side branches. This is called apical dominance. By breaking it, you turn a single-stem plant into a bush.
The Right Way to Harvest Hydroponic Herbs
Step 1: Wait until there are at least 6–8 sets of leaves on the plant before the first harvest.
Step 2: Make a clean cut just above the third or fourth node from the top. Nodes are where the leaves branch out from the stem.
Step 3: As the plant grows back and fills out, repeat the process on every new branch.
In a matter of weeks, your plant will be transformed — wide, dense, and packed with leaves instead of tall and leggy.
Harvesting Frequency by Herb
| Herb | How Often to Harvest | Key Tip |
|---|---|---|
| Basil | Every 7–10 days | Pinch off flower buds as soon as you see them |
| Mint | Every 10–14 days | Cut down to 1/3 of total height |
| Parsley | Every 2–3 weeks | Always cut outer stems first |
| Cilantro | Every 7–10 days | Harvest before it bolts |
| Chives | Every 3–4 weeks | Cut at least 2 inches above the base |
Technique #6 — Beneficial Microbes in a Hydroponic System
Wait — microbes? In hydroponics?
Yes. And this is one of the greatest secrets in the whole hobby.
Hydroponics is thought of as a sterile system by most people. And while you do want to avoid harmful bacteria, there are beneficial microbes that vastly improve root health and nutrient uptake.
The most important ones are:
- Mycorrhizal fungi — These form a relationship with roots and extend their reach, pulling in more nutrients
- Bacillus subtilis — A beneficial bacteria that combats root rot and enhances plant immunity
- Trichoderma — A fungus that combats bad pathogens and encourages root development
How to Add Beneficial Microbes to Your System
These can be found in products like Great White, Hydroguard, or Recharge. Add them to your reservoir following the product instructions — typically once per week or whenever you change the water.
One important note: if you are using hydrogen peroxide to sterilize your system, stop using it once you add beneficial microbes. The peroxide will kill them. Instead, use UV sterilization or low-dose chloramine-T to manage bad bacteria while keeping the good ones alive.
This technique alone can reduce root rot problems by more than half.
Technique #7 — Boosting Herb Growth With CO₂
Plants inhale CO₂ and exhale oxygen. It’s the very opposite of what we do.
Inside an enclosed indoor grow space, CO₂ levels can drop rapidly as plants consume it. When levels fall below 350–400 ppm (parts per million), plant growth slows down noticeably.
The secret: raising CO₂ levels to 1,000–1,200 ppm can increase growth rates by 20–30%.
According to research published by the University of Arizona’s Controlled Environment Agriculture Center, CO₂ enrichment is one of the most effective and underused tools in indoor growing environments.
Ways to Add CO₂ to Your Grow Space
Option 1 — CO₂ Bags These bags contain organic materials that produce CO₂ as they decompose. They’re inexpensive, simple, and ideal for small spaces.
Option 2 — CO₂ Generators These create CO₂ by burning propane or natural gas. They work well for large grow rooms but do produce heat.
Option 3 — Compressed CO₂ Tanks The most precise option. You can pair a CO₂ tank with a controller and regulator to maintain perfect CO₂ levels automatically.
Option 4 — Natural Fermentation Mix sugar, water, and yeast in a bottle with a tube running into your grow space. The fermentation process releases CO₂. It’s not very precise, but it’s almost free.
CO₂ Only Works When Other Conditions Are Right
CO₂ enrichment works best when your plants already have:
- Strong light intensity
- Proper nutrients
- Good temperature and humidity
If any of those aren’t right, adding extra CO₂ won’t do much good.
Technique #8 — Clone Your Best Plants for Free Unlimited Herbs
This is the ultimate secret weapon of serious hydroponic growers.
Rather than purchasing seeds every time, you can clone your best-performing plants — for free, over and over again.
Cloning means taking a cutting from a healthy parent plant and rooting it in your hydroponic system. The new plant will be genetically identical to the parent, which means it will have the same taste, growth rate, and aroma.
Step-by-Step Cloning Process for Hydroponic Herbs
Step 1 — Select a Healthy Parent Plant Look for a plant with strong stems, rich color, and no signs of disease or pests.
Step 2 — Take Your Cutting Use a sharp, clean blade. Take a 3–5 inch cutting with at least 2–3 nodes. Cut at a 45-degree angle to increase the rooting surface.
Step 3 — Remove Lower Leaves Strip off any leaves from the bottom half of the cutting. Leaves left underwater will rot.
Step 4 — Apply Rooting Hormone Dip the cut end into a rooting gel or powder. This signals the cutting to grow roots instead of leaves.
Step 5 — Place in a Cloning Medium Use rockwool cubes, rapid rooter plugs, or a cloning machine filled with water and rooting solution.
Step 6 — Maintain High Humidity Cover your cuttings with a humidity dome. Aim for 80–90% relative humidity until roots appear.
Step 7 — Transplant When Roots Are 1–2 Inches Long As soon as you see healthy white roots, transplant the clone into your main hydroponic system.
Best Herbs for Cloning
| Herb | Cloning Difficulty | Time to Root |
|---|---|---|
| Mint | Very Easy | 5–7 days |
| Basil | Easy | 7–10 days |
| Rosemary | Moderate | 2–4 weeks |
| Thyme | Moderate | 2–3 weeks |
| Oregano | Easy | 7–14 days |
| Chives | Hard (better from division) | N/A |
Putting It All Together — A Simple Action Plan
You don’t need to apply all 8 techniques at once. Pick the ones that work with your current setup.
Beginner priority list:
- Match your system to your herb (Technique #1)
- Get your root zone temperature right (Technique #2)
- Set the right light schedule (Technique #3)
- Harvest strategically to grow bushier plants (Technique #5)
Intermediate priority list: 5. Adjust your nutrient ratios for flavor (Technique #4) 6. Add beneficial microbes (Technique #6) 7. Clone your best plants (Technique #8)
Advanced add-on: 8. Add CO₂ enrichment only when everything else is dialed in (Technique #7)
Each technique builds on the last. The more you stack them, the better your results.
FAQs About Hydroponic Herbs Techniques
Q: Is it safe to use tap water in my hydroponic herbs system? Yes, but you need to let it sit out for 24 hours first so the chlorine can evaporate. Another option is to use a carbon filter or add a dechlorinator. Always check pH before adding nutrients — target 5.5–6.5.
Q: How often should I change the water in my reservoir? For most systems, change the entire reservoir every 1–2 weeks. Top off with fresh water daily as needed. This prevents nutrient imbalances and salt buildup.
Q: Do hydroponic herbs taste different from soil-grown ones? Many growers say hydroponic herbs are actually more flavorful. Because the plants are under less stress and receive precise nutrients, they often produce more essential oils — which is what creates flavor and aroma.
Q: What is the easiest herb to start with in hydroponics? Mint and basil are the easiest. They root quickly, grow fast, and are very forgiving of mistakes while you’re learning.
Q: Is it expensive to set up hydroponic herb growing? It doesn’t have to be. A simple Kratky setup for a few herbs can cost less than $50. More sophisticated systems with lighting and climate control can run several hundred dollars, but the yield and quality tend to make up for it quickly.
Q: Can I grow hydroponic herbs outdoors? Yes, provided you control the temperature of your reservoir and protect the system from rain, which can dilute your nutrient solution. Most systems thrive in a shaded outdoor area with controlled humidity.
Q: How can I keep algae from developing in my reservoir? Keep light completely away from your reservoir. Use opaque containers and cover all openings. Since algae competes with plants for nutrients and oxygen, this is worth doing from day one.
Final Thoughts
Growing herbs hydroponically is more than a hobby — it’s a skill. And like any skill, the difference between average results and amazing ones comes down to the details.
These 8 hydroponic herbs techniques are not complicated. But they are specific. They ask you to pay attention, make adjustments, and think of your plants as living systems rather than just green things sitting in water.
Start with one or two techniques. See the difference they make. Then add more.
Before you know it, you’ll have an indoor herb garden that produces more flavor, more yield, and more satisfaction than you ever imagined — without ever touching a single handful of dirt.