The majority of home practitioners who start a medicinal herb garden quite often drop out in the first 2 months.
Not because it’s hard. But because no one shared with them the true secrets of making it happen.
They buy a few pots, plenty of seeds, scatter them and water every now and then — and wonder why their lavender looks lifeless or their peppermint is dying. Sound familiar?
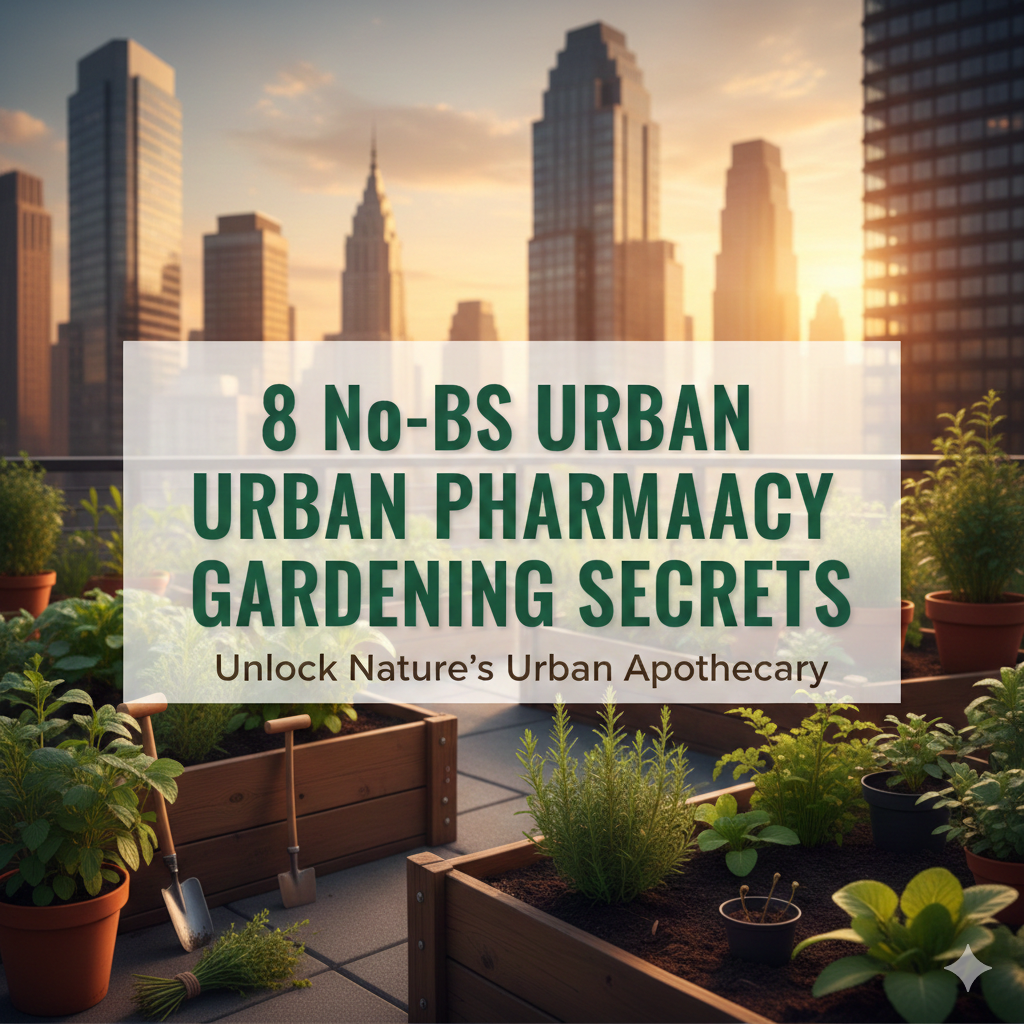
One of the most rewarding actions you can take in an urban environment is engaging in pharmacy gardening. Medicinal herbs at your fingertips. No expensive supplements. Nothing mysterious on a label. Just actual plants with real benefits growing in your home.
But that’s a far cry from a thriving indoor apothecary, though. That gap is knowledge.
Eight secrets to bridge the gap.
Whether you’re growing on a windowsill, balcony, vertical wall or under grow lights — these tips translate across any setup. They come from urban growers, herbalists and plant scientists with real experience of what actually moves the needle.
Let’s dig in.
Secret 1: Soil Is Everything — Don’t Skip This
How Most Beginners Get Soil Wrong
If you go into any garden center, there are dozens of soil choices. Beginners mostly buy what’s cheapest or whatever the bag says is “all-purpose.” That’s the first mistake.
Medicinal herbs differ from tomatoes or decorative flowers. They evolved in certain soil conditions — usually lean, dry and well-draining. In heavy soil that retains too much water, the roots begin to suffocate. The plant lives but just gets by. And a plant that isn’t thriving doesn’t produce good medicinal compounds.
The secret is this: the more stressed a herb is by bad growing conditions, the less essential oils it produces. Essential oils are the active compounds responsible for the healing power of medicinal herbs. Your job is to raise a happy, healthy plant in the appropriate medium — and it all begins with soil.
A Soil Blend Suited for Urban Pharmacy Essentials
| Herb Type | Ideal Soil Mix | Key Requirement |
|---|---|---|
| Mediterranean (lavender, rosemary, thyme) | 60% potting mix + 40% perlite | Fast drainage, low nutrients |
| Tropical (holy basil, lemon verbena) | 70% potting mix + 30% compost | Rich, moisture-retaining |
| Root herbs (valerian, ashwagandha) | 50% potting mix + 30% sand + 20% compost | Deep, loose, aerated |
| Moisture-loving (mint or lemon balm) | 80% potting mix + 20% compost | Consistently moist but not soggy |
| Succulents (aloe vera) | 50% potting mix + 50% coarse sand or perlite | Very fast draining |
The One Simple Upgrade That Changes Everything
Top dress the surface of your soil with a thin layer of worm castings every 6–8 weeks. Worm castings are one of the most complete fertilizers that nature produces. They are slow-release, improve soil structure and increase microbial activity. Simply this one habit will significantly enhance the health and potency of your urban pharmacy herbs.
Secret 2: Light Placement Is a Science, Not Guesswork
The Myth of “Plenty of Light”
People say “put it in a sunny spot” as though that’s the full story. It isn’t.
Medicinal herbs have wildly different light requirements. Placing a shade-loving herb, such as lemon balm, in direct afternoon sunlight will crisp the leaves and diminish its healing compounds. A sun-seeking herb, like lavender, set in a dark corner will become leggy, weak and nearly useless as medicine.
Success with urban pharmacy gardening hinges on knowing precisely which light zone each plant belongs in — and placing it there.
Indoor Herbs: A Simple Light Zone Guide
Zone 1 — Full Sun (6+ hours direct light): South-facing windowsill. Best for lavender, rosemary, holy basil, thyme, chamomile and oregano.
Zone 2 — Partial Sun (3–6 hours light, some indirect): East- or west-facing windows. Ideal for peppermint, lemon balm, parsley and calendula.
Zone 3 — Low Light (under 3 hours, mostly indirect): North-facing windows or inside shelves with grow lights. Good for aloe vera and certain ferns used in herbal practice.
The Grow Light Secret That City Growers Swear By
If your apartment doesn’t receive sufficient natural light — and most urban apartments do not — full-spectrum LED grow lights will be your best friend.
Choose lights in the 3000K to 6500K range. The lower end (3000K) replicates warm afternoon sun and encourages flowering. The higher end (6500K) emulates cool daylight and promotes leafy growth. For the majority of medicinal herbs, a 4000K–5000K light works beautifully.
Run grow lights for 14–16 hours per day to create optimal growing conditions. Use a simple plug-in timer so you don’t ever have to think about it.
Secret 3: Harvest Timing Can Double Your Herb’s Potency
The Exact Right Moment to Pick
This is one of the most overlooked secrets in urban pharmacy gardening. Most people harvest whenever they feel like it. That is leaving serious potency on the table.
Medicinal herbs only produce their maximum concentration of essential oils and active compounds at certain precise moments. Getting the timing right can literally double the strength of what you harvest.
Here’s what the research shows:
Time of day: Harvest in the late morning, after the dew has dried but before the heat of the afternoon. Research shows that the essential oil content in herbs such as peppermint and lavender is highest during the morning hours.
Stage of growth: The optimal time to harvest for most leafy herbs is just before the plant flowers. That is when it’s channeling maximum energy into its leaves. The potency of leaves decreases markedly once it flowers and goes to seed.
Season: For medicinal herbs growing in temperate zones, late spring to midsummer tends to be the time of greatest potency.
Harvest Timing Cheat Sheet
| Herb | Best Time to Harvest | What to Harvest | When to Avoid |
|---|---|---|---|
| Peppermint | Just before flowering | Stems and leaves | After flowering |
| Lavender | When 50% of buds are open | Flower spikes | Fully open blooms |
| Chamomile | When flowers are fully open | Flower heads | Before full bloom |
| Lemon Balm | Before flowering | Young leaves | After flowering |
| Holy Basil | Before seed set | Leaves and flowers | When seeding |
| Echinacea | In the third year | Roots and flowers | First two years |
| Calendula | Throughout flowering | Open flower heads | Seed stage |
Secret 4: Container Size Directly Affects Medicinal Strength
Size Matters — Bigger Isn’t Always Better
This is something that surprises most people new to urban pharmacy herb gardening: the size of your pot affects how potent your herbs are.
It causes stress when a plant is root-bound — its roots have filled the pot and have nowhere to go. A little stress in plants is actually beneficial. It triggers the production of secondary metabolites — the plant’s defense chemicals. These are the same compounds that lend herbs their healing value.
However, excessive stress from being severely pot-bound shuts down plant health entirely. The key is to hit the sweet spot.
The Right Container Size for Each Herb
| Herb | Ideal Pot Size | Reason |
|---|---|---|
| Peppermint | 8–10 inches | Spreads aggressively, needs room |
| Lavender | 12–16 inches | Deep root system, needs drainage |
| Chamomile | 6–8 inches | Compact root ball |
| Holy Basil | 8–10 inches | Moderate grower |
| Aloe Vera | Equal to the plant’s spread | Grows slowly, hates big pots |
| Echinacea | 12–14 inches | Deep taproot |
| Lemon Balm | 10–12 inches | Spreads like mint |
| Rosemary | 12–14 inches | Woody, deep roots |
Container Material Matters Too
Terracotta is the gold standard for most medicinal herbs. It breathes, regulates temperature and prevents overwatering. The trade-off is that it dries out more quickly, so you’ll water more frequently.
Fabric grow bags are perfect for balcony growers. They air-prune roots naturally, keeping the plant in that productive “mildly stressed” state.
Plastic pots hold moisture longer, which benefits moisture-loving herbs like mint and lemon balm but is a disaster for Mediterranean varieties like lavender and thyme.
Secret 5: The Companion Planting Trick That Boosts Potency and Repels Pests
Plants Have Buddies — Use Them
Companion planting is the practice of growing certain plants in close proximity for mutual benefit. For centuries, it has been used in traditional agriculture. In an urban pharmacy garden, it’s a powerful tool that most beginners don’t even think about.
Some combinations of plants actually encourage essential oil production in both plants. Others repel pests naturally. Some even enhance soil health, helping everything around them.
Best Companion Planting Pairings for Urban Pharmacy Herbs
| Plant | Best Companion | Benefit |
|---|---|---|
| Lavender | Rosemary | Repels pests, same care needs |
| Chamomile | Any herb | Improves neighbors’ growth |
| Peppermint | Isolated or with tomatoes | Repels aphids and fungus gnats |
| Holy Basil | Lemon balm | Mutual pest deterrence |
| Calendula | Any plant | Attracts pollinators, deters pests |
| Echinacea | Chamomile | Attracts beneficial insects |
One Warning About Mint
Mint is one herb that you want to generally keep contained on its own. It spreads aggressively through underground runners and will seize a container it shares with another plant. Keep it in its own pot. Always.
Secret 6: Water Quality Is Silently Killing Your Herbs
The Tap Water Problem No One Discusses
This is one of the most underrated urban pharmacy gardening secrets. Most city tap water contains chlorine and chloramine — chemicals used to make water safe to drink. These chemicals are terrific for humans. They’re bad for the beneficial microbes in your soil.
Medicinal herbs need healthy soil microbiota to absorb nutrients properly. Watering repeatedly with chlorinated tap water slowly kills the microbial life in your soil. The result is a plant that seems fine but yields weaker medicinal compounds over time.
Simple Solutions for Better Watering
Let tap water sit overnight. Chlorine dissipates from still water within 24 hours. Leave a jug of water out on your counter the evening before watering. This is free and effective.
Use a filtered pitcher. A basic water filter pitcher removes chlorine and other impurities. Your herbs will get much cleaner water.
Collect rainwater. If you have a balcony, set out a container during rain. Rainwater is naturally soft, slightly acidic and chlorine-free. Plants absolutely love it.
Use room temperature water. Cold water from the tap shocks plant roots. For best results, always water with room temperature water.
Watering Frequency by Season
| Season | Watering Frequency (Avg.) | Key Tip |
|---|---|---|
| Spring | Every 2–3 days | Increase as growth picks up |
| Summer | Daily or every 2 days | Check soil every morning |
| Autumn | Every 3–4 days | Reduce as growth slows |
| Winter | Every 5–7 days | Let soil dry between waterings |
Secret 7: Pruning the Right Way Turns One Plant Into Three
The Most Common Mistake: Too Little — or Not at All
Pruning feels counterintuitive. You’ve nurtured this lovely herb and now you’re supposed to cut it back? Yes. And mastering it is one of urban pharmacy gardening’s most powerful growth secrets.
When you prune a herb the right way, you force it to branch out. One stem becomes two. Two become four. Within weeks, a plant can double or triple in size and leaf production. More leaves means more medicinal material to harvest.
Pruning also prevents a plant from flowering and going to seed too soon, which — as discussed in Secret 3 — reduces leaf potency significantly.
How to Prune Medicinal Herbs the Right Way
Always cut just above a leaf node. A leaf node is the point on a stem where leaves or branches emerge. Cutting just above this point stimulates two new shoots to grow from that same spot.
Never remove more than one-third of the plant at once. Removing too much at once can severely stress the plant and stunt its recovery.
Use clean, sharp scissors or pruning shears. Dull or dirty tools crush the stem and may introduce disease. Wipe your scissors with rubbing alcohol between each plant.
Pinch herbs regularly. For herbs such as basil, holy basil and lemon balm, you can pinch off the top growing tip with your fingers every week or two. This is a basic form of pruning that greatly stimulates bushy growth.
Pruning Schedule for Key Medicinal Herbs
| Herb | Pruning Method | Frequency |
|---|---|---|
| Holy Basil | Pinch tops, remove flower buds | Weekly during growing season |
| Peppermint | Cut stems back by one-third | Every 3–4 weeks |
| Lavender | Trim after flowering | Once or twice yearly |
| Lemon Balm | Cut back heavily | Every 6–8 weeks |
| Rosemary | Light tip pruning | Monthly |
| Chamomile | Deadhead spent flowers | Every few days during bloom |
Secret 8: Build a Preservation System That Multiplies Your Garden’s Value
Harvesting Without a Plan Is Only Half the Work
You’ve grown beautiful, potent medicinal herbs. You’ve harvested them at the right time. Now what?
The most typical scenario for beginner urban pharmacy gardeners is to harvest a bunch of herbs, fail to act on them quickly enough, and watch them wilt and lose potency in a glass of water on the counter. This is where a good preservation system elevates your garden from a pastime to an actual home apothecary.
A good preservation system means your garden continues to produce value year-round — not just during the growing season.
For more guidance on which herbs to grow and how to use them, The Herb Garden is an excellent resource for both beginners and experienced growers building their own medicinal collections.
The Four Best Preservation Methods
Air drying: The most ancient and basic method. Form small bundles (5–10 stems) tied with twine, then hang them upside down in a warm, dark, well-ventilated area. Most herbs dry entirely in 1–2 weeks. Best for: lavender, rosemary, thyme, chamomile and calendula.
Food dehydrator: Quicker and more uniform than air drying. Set to 95°F–115°F (35°C–46°C). Most herbs dry in 2–4 hours. Low heat preserves essential oils better than oven drying. Best for: leafy herbs and flower heads.
Freezing: Some herbs preserve better when frozen. Finely chop the herb, place in ice cube trays, cover with water or olive oil and freeze. Pop a cube whenever you need fresh herb flavor or healing benefits. Best for: lemon balm, mint and holy basil.
Tincture making: Soak fresh or dried herbs in high-proof alcohol (vodka or grain alcohol) for 4–6 weeks. Strain and bottle. Tinctures preserve the medicinal compounds of herbs for 3–5 years and are highly concentrated. Best for: echinacea, valerian and St. John’s Wort.
Storage Guide for Preserved Herbs
| Preservation Method | Storage Container | Shelf Life | Best Conditions |
|---|---|---|---|
| Air-dried | Airtight glass jar | 12–18 months | Dark, cool, dry |
| Dehydrated | Airtight glass jar | 12–24 months | Dark, cool, dry |
| Frozen (ice cubes) | Zip-lock freezer bag | 6–12 months | Frozen |
| Tincture | Dark glass dropper bottle | 3–5 years | Cool, dark shelf |
Label Everything — Seriously
It sounds simple, but it derails so many home apothecaries. When herbs are dried, many appear virtually identical. Mixing up dried chamomile and dried calendula could mean using the wrong herb for the wrong purpose.
Label every jar, bottle and bag with:
- The herb name
- The date harvested
- The part of plant used (leaf, flower, root)
- The preservation method used
Bonus Tips: Small Habits That Make a Big Difference
In addition to the 8 core secrets, here are some smaller habits that experienced urban pharmacy gardeners swear by:
Rotate your plants. Give each pot a quarter turn every week so all sides receive equal light. This prevents lopsided growth.
Talk to your plants — or just breathe near them. Plants absorb carbon dioxide. Exhaling near them during routine check-ins gives them a small CO2 boost. More importantly, frequent close observation helps you spot problems early.
Keep a garden journal. Keep notes about what you planted, when you watered and harvested, and what you noticed. After a couple of months, patterns emerge that help you optimize your system.
Group herbs with similar needs together. Mediterranean herbs (lavender, rosemary, thyme) expect the same treatment. Moisture-loving herbs (mint, lemon balm) seek the same treatment. Grouping them makes your routine much easier.
FAQs About Urban Pharmacy Gardening Secrets
Q: How can I tell if my herbs are producing enough medicinal compounds? Good indicators are strong scent, bright color and healthy leaf texture. A potent peppermint plant should smell intensely minty when you brush the leaves. A faint fragrance typically indicates low essential oil content. If the scent seems weak, check your soil, light and watering practices.
Q: Can I use regular fertilizer on medicinal herbs? Use fertilizer sparingly. High-nitrogen fertilizers encourage quick leafy growth but can dilute the concentration of medicinal compounds. If you fertilize, use a balanced organic fertilizer at half the recommended strength, or stick with worm castings and compost.
Q: What is the single biggest mistake urban pharmacy gardeners make? Overwatering, without a doubt. It’s the most common cause of herb death indoors. Always check the soil moisture before watering. Most herbs prefer to dry out slightly between waterings.
Q: How long does it take to build a proper urban pharmacy garden? Within 8–12 weeks from the day you start, you can have a thriving 6–8 herb indoor garden. A more complete apothecary setup with 15–20 plants, preservation systems and various growing methods can take 6–12 months to fully build out.
Q: Is urban pharmacy gardening safe for families with small children? Most common medicinal herbs are safe. However, some plants used in herbal medicine — such as St. John’s Wort and valerian in large amounts — should be kept out of reach of small children. Always research every plant before bringing it into a home with children.
Q: Do I have to repot my herbs every year? Not necessarily. Certain herbs actually benefit from being slightly root-bound. Check the drainage holes of each pot annually. If roots are visibly circling or escaping through the holes, it’s time to up-pot by one size.
Q: Are these secrets applicable to hydroponic urban pharmacy systems? Absolutely. Secrets 2, 3, 5, 7 and 8 relate directly to hydroponic growing. Secrets 1, 4 and 6 apply with modifications — in hydroponics, the quality of your nutrient solution and pH level take the place of soil quality and water quality concerns.
Your Urban Pharmacy Garden Is Long Overdue
Building a thriving medicinal herb garden in a city home is nothing complicated. The difference between people who succeed and those who quit is knowing these secrets early.
Get your soil right. Place plants in their optimal light zone. Harvest at peak potency. Choose the right container size. Use companion planting strategically. Improve your water quality. Prune with purpose. And build a preservation system that makes every harvest count.
Urban pharmacy gardening is more than plant cultivation. It’s about developing confidence in your ability to support your health naturally. Every herb you grow, harvest and preserve is proof that you don’t need a yard, a farm or an expert to create a home healing garden.
You need the right knowledge. Now you have it.
Start with one secret. Apply it this week. Then layer in the next. Soon enough, your windowsill, balcony or grow-light shelf will be producing the kind of medicinal-quality herbs that most people find only at specialty health stores.
One pot. One secret. One step at a time.