Homegrown herbs sound lovely — until you are contending with soggy soil, root rot or bugs crawling through your windowsill pots.
That’s where hydroponics changes everything.
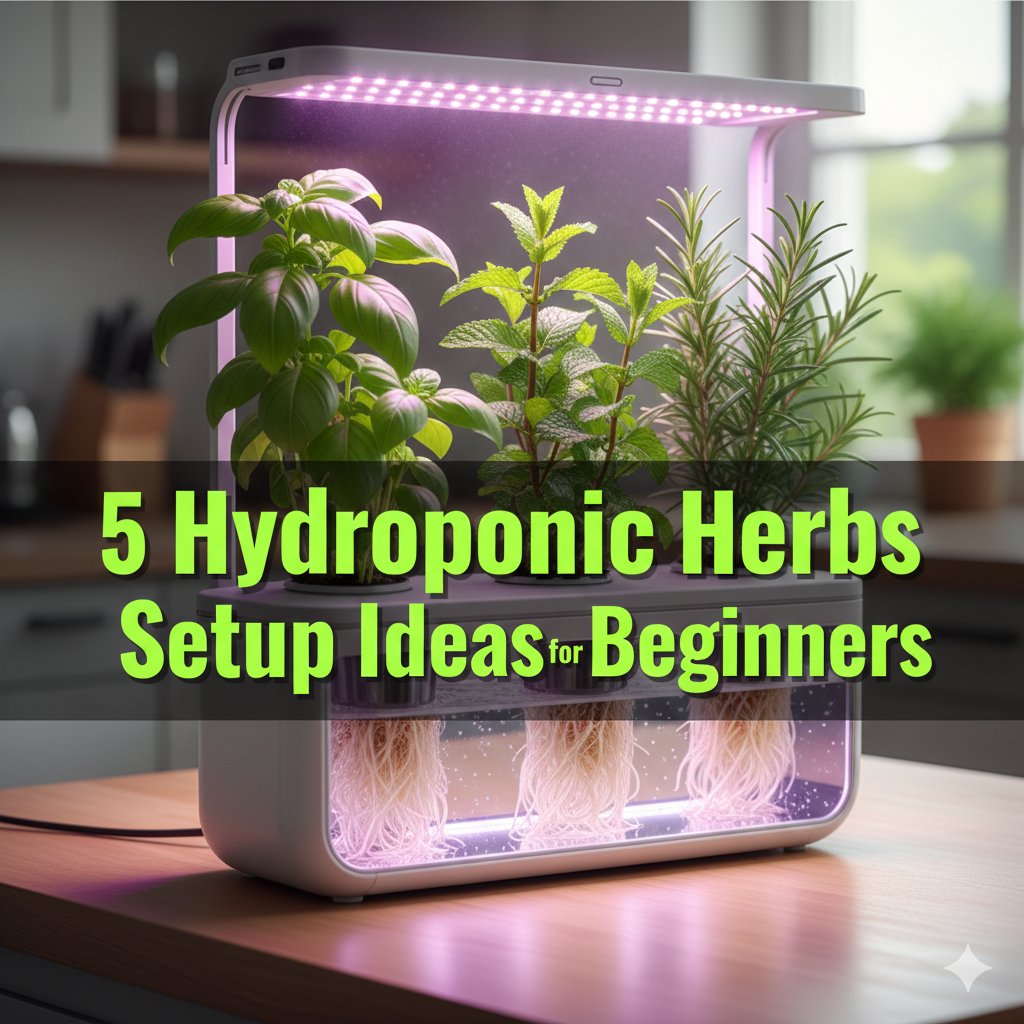
Hydroponic herb gardens allow you to use water instead of soil to grow fresh basil, mint, cilantro and more. No mess. No guessing. Just good, healthy growth directly in your kitchen, on your balcony or in your bedroom.
The best part? You don’t have to be a scientist or spend an arm and a leg to get started.
Here are 5 easy hydroponic herbs setup ideas that are beginner-friendly, space-saving, and surprisingly simple to pull off. So, whether you’ve got a tiny apartment or a big backyard, there’s just the right setup here to fit your life.
Let’s dig in — well, without the digging.
Why Hydroponically Grow Herbs In the First Place?
Before diving into the setups, it’s worth knowing why so many home growers are abandoning soil for water-based systems.
Hydroponic herbs grow 30–50% faster than traditional soil-grown herbs. That’s because their roots have untrammeled access to nutrients without needing to forage through dirt. The plant uses less energy searching for food and more on leaf growth.
Here’s a quick comparison of the two methods:
| Feature | Soil Growing | Hydroponic Growing |
|---|---|---|
| Speed of Growth | Slower | 30–50% faster |
| Water Consumption | High | Up to 90% less |
| Space Required | More | Compact setups possible |
| Pest Risk | More | Low |
| Mess Level | Muddy | Clean and tidy |
| Beginner Friendly | Moderate | Very easy |
Hydroponics requires as much as 90% less water than traditional gardening. The water circulates in the system rather than being absorbed or evaporated by soil.
And with no soil, there are far fewer pests, fungal issues and weeds to contend with.
It’s cleaner, quicker and frankly more gratifying to snip fresh herbs right into your pasta.
Which Herbs Are Best for Hydroponic Systems?
Not all herbs grow as well in water. Some love it. Some want to stay in soil.
Here are the best performing hydroponic herbs:
- Basil — Easy to grow, loves warmth and ideal for beginners
- Mint — Aggressive grower, spreads quickly in water
- Cilantro — Fast grower that prefers cooler temperatures
- Parsley — Steady grower but slower to start
- Chives — Tolerant of some neglect, very hardy
- Lettuce-leaf herbs — Such as Thai basil or lemon balm
Woody herbs like rosemary and thyme should be avoided in deep water systems — they don’t like having too much moisture around their roots and thrive best in media-based setups.
Setup Idea #1 — The Mason Jar Kratky Method
The Most Basic System You’ll Ever Build
Hands down the easiest hydroponic system for beginners is the Kratky method. No pumps, no electricity, no timers, and none of that complicated equipment.
Here’s how it works: You insert a tiny net pot (a little cup with holes in it) into the mouth of a mason jar. The plant sits inside the net pot with its roots hanging down into nutrient-rich water. As the plant drinks the water, a gap of air forms between the surface of the water and the roots. That gap allows the roots to breathe — something they need just as much as water.
What You Need
- Quart-size wide-mouth mason jars
- Net pots (2-inch size works with most mason jar lids)
- Hydroponic nutrients (liquid form)
- Rockwool cubes or clay pebbles
- Herb seeds or seedlings
- Dark fabric or spray paint (to shield the jar from light)
Step-by-Step to Get Started
- Add nutrient-infused water to the mason jar
- Set the net cup into the opening of the jar so it fits snugly
- Add your growing medium (clay pebbles or rockwool) to the cup
- Plant your seed or seedling into the cup
- Make sure the roots (or bottom of rockwool) just touch the water
- Wrap the jar in dark material to avoid algae growth
- Place it near a sunny window or under a grow light
Best herbs for this setup: Basil, mint, chives and lettuce-leaf herbs
This is a perfect countertop setup for your kitchen. You can line up 4–5 jars and have yourself a micro herb garden within weeks.
Setup Idea #2 — The PVC Pipe NFT System
Grow a Full Row of Herbs Like a Pro
NFT stands for Nutrient Film Technique. It’s one of the most popular hydroponic systems used in commercial greenhouses — and you can build a small version at home with PVC pipes.
In this system, a continuous thin film of nutrient water passes through a tilted pipe. Plant roots grow inside the tube and absorb nutrients as the water passes through them. The water then flows down, gathers at the bottom, and is pumped back up to the top in a cycle.
Why This Setup Works Well for Herbs
If you want to grow many herbs at once, this system is ideal. One 4-foot PVC pipe can hold 6–8 herb plants. Add two or three pipes onto a wooden frame and you’ve got yourself a vertical herb wall.
Basic Materials List
| Item | Usage |
|---|---|
| 4-inch PVC pipes | The primary growing channel |
| Small submersible pump | Water circulation |
| Plastic tubing | Pump to pipe connection |
| Net cups (2-inch) | Plant holders in pipe holes |
| Reservoir tank | Holds the nutrient water |
| Hydroponic nutrients | Feed for plants |
| Timer (optional) | Controls pump cycling |
How to Set It Up
- Space the drill holes in the PVC pipe around 6 inches apart
- Tilt the pipe just a bit (1–2 degrees) so water travels downhill
- Run tubing from the pump in your reservoir to the top of the pipe
- Water flows down and drips back into the reservoir
- Put net cups in the holes and place your plants
- Let the pump run continuously or on a timer (15 minutes on, 15 minutes off works great)
Best herbs for this setup: Basil, parsley, cilantro, chives
This setup takes a weekend to build but pays off with months of fresh herbs.
Setup Idea #3 — The Deep Water Culture (DWC) Bucket
The Method That Grows the Fastest
Deep Water Culture (DWC) suspends plant roots directly in aerated, nutrient-rich water. An air pump constantly bubbles oxygen into the water, keeping roots healthy and fostering explosive growth.
It is one of the fastest-growing hydroponic systems available. Herbs from DWC systems can grow twice as fast compared to soil.
What Makes DWC Different
Other methods only bring roots into contact with air and water at different time intervals. In DWC, the roots are submerged in constantly aerated water. The air pump oxygenates the water using an air stone — just like what you see in a fish tank.
Equipment You’ll Need
- 5-gallon bucket with a lid
- Air pump
- Air stone and tubing
- Net cup (6-inch fits most bucket lids)
- Hydroponic nutrient solution
- pH testing kit
- Growing medium (clay pebbles work best)
Getting It Running
- Fill the bucket with water and add nutrients as directed
- Test and adjust the pH to 5.5–6.5 (this is the sweet spot for most herbs)
- Connect the air stone to the air pump with tubing
- Put the air stone in the bucket and run the tubing out through a small hole in the lid
- Drill a hole in the lid sized for your net cup
- Put your plant into the net cup with clay pebbles holding it steady
- Make sure roots are hanging into the water
- Plug in the air pump and let the magic unfold
Best herbs for this setup: Basil (grows incredibly well), mint, lemon balm
Pro tip: Paint the outside of the bucket white to reflect heat and keep the roots cooler. The ideal water temperature is 65–72°F.
Setup Idea #4 — The Vertical Tower Garden
Save Space, Grow More
If you don’t have much space but want to grow all sorts of herbs, a vertical tower garden will give you the biggest bang for your buck.
Tower gardens stack plants vertically, so rather than spreading out across your counter or floor, your herb garden grows upward. They are the perfect option for balconies, compact patios or indoor setups near a window.
If you’re just getting started and want to learn more about which herbs thrive in various conditions, The Herb Garden is a great resource for beginner and experienced growers alike.
How Tower Systems Work
Most tower gardens use a setup where water is pumped up to the top of the tower and then trickles down through channels where plants are rooted. Each plant sits in a small pocket or cup cut into the side of the tower.
Gravity pulls the water down through every plant’s root zone before it pools at the bottom — where it is pumped back to the top again.
Types of Vertical Towers You Can Build or Buy
DIY PVC Tower:
- Stack vertical PVC pipes with angled holes cut in
- Use a small pump to send water to the top
- Cheap and fully customizable
Felt Pocket Tower:
- Hang felt pockets on a wall or fence
- Fill with growing medium
- Water by hand or connect a drip irrigation system
Commercial Tower Garden:
- Brands like Tower Garden or Lettuce Grow offer pre-manufactured versions
- Costlier but simpler to set up
Herbs That Love Tower Gardens
| Herb | Growth Rate in Tower | Notes |
|---|---|---|
| Basil | Fast | Loves heat and warmth |
| Mint | Very Fast | Keep separate — it spreads |
| Parsley | Moderate | Consistent watering needed |
| Chives | Fast | Hardy and forgiving |
| Cilantro | Moderate | Cooler temperatures better |
| Oregano | Moderate | Keep roots slightly drier |
A tower garden with 20 plant spots occupies the same floor space as one flower pot. It’s a lifesaver for apartment dwellers.
Setup Idea #5 — The Herb Raft (Floating Platform System)
A Fun Visual System Your Kids Will Love Too
The floating raft system — also called the float system or raft hydroponics — is exactly what it sounds like. Plants are suspended above a nutrient solution in a shallow tray, with their roots dangling down into the water below.
It’s simple, visual and very fun to watch.
Why This One Is Great for Families
Because it’s so open and visible, you can actually watch the roots grow over time. Kids find this fascinating. It’s an amazing learning project that also yields real, usable herbs.
How to Build a Basic Raft System
- Find a large, shallow container — a plastic storage tote works great
- Cut a piece of foam board (like a styrofoam sheet) to fit the container
- Cut holes in the foam to fit your net cups
- Fill the container with nutrient water
- Float the foam on top — the holes should sit just at water level
- Insert your seedlings in net cups
- Drop an air stone into the water below (optional but helpful)
- Place the whole thing under grow lights or in a sunny window
Best container size: Minimum 10 gallons for stable water temperature
Best herbs for this setup: Basil, cilantro, mint, lemon balm, watercress
Float System Quick-Glance
| Pros | Cons |
|---|---|
| Very easy to build | Requires a lot of floor space |
| Great starter system | Water temp can fluctuate |
| Visible root growth | Algae can form if not covered |
| Inexpensive | Not ideal for tall herbs |
| Kids love it | Restricted to smaller herbs |
Make sure to tape or cover the edges of the foam with foil so light doesn’t hit the water. Light + water = algae, which competes with your plants for nutrients.
Lighting Your Hydroponic Herb Garden
Natural Light vs. Grow Lights
Most herbs require 6–8 hours of direct or bright light each day to thrive. If your setup is next to a south-facing window, natural light should be enough — at least in summer.
For indoor setups or during winter months, grow lights make a huge difference.
Types of herb grow lights:
- LED grow lights — Energy-efficient, low heat, great spectrum for herbs, best choice for most home setups
- Fluorescent (T5) lights — Budget-friendly and suitable for small herb gardens
- Full-spectrum bulbs — Screw into ordinary light fixtures, a nice and easy upgrade
Place LED lights 4–6 inches above seedlings and 8–12 inches above mature plants. A regular outlet timer set for 14–16 hours of light per day removes all the guesswork.
Nutrient Solutions — Feeding Your Hydroponic Herbs
What Goes Into the Water
Tap water alone won’t cut it. Hydroponic plants need nutrients added to the water. You can purchase premixed liquid nutrients formulated for hydroponics — General Hydroponics, Fox Farm and Masterblend are popular choices.
Always follow the instructions on the label. More is not better — excess nutrients can actually burn your plants.
Key things to monitor:
- pH level: Keep it between 5.5 and 6.5 for herbs
- EC (Electrical Conductivity): Measures nutrient concentration. Herbs prefer a lower EC of around 1.0–2.0
- Water temperature: Aim for 65–72°F
Inexpensive pH meters and EC meters are widely available online and make monitoring simple.
Troubleshooting Common Problems
When Things Go Wrong
Even simple systems hit snags. Here’s what to watch for:
Yellow leaves — Generally indicates a nutrient deficiency. Check your nutrient levels and pH.
Brown, mushy roots — Root rot. Usually caused by warm water or too little oxygen. Use an air stone or lower your water temperature.
Algae growth — Green slime in your reservoir. Block any exposed water from light.
Slow growth — Check your light. The biggest herb struggles come from not enough light, too many nutrients, or the wrong pH.
Wilting despite water — May be too high a nutrient concentration. Flush the system with clean water and start fresh with a lower dose.
FAQs About Hydroponic Herbs Setups
Q: Do I need a lot of money to start a hydroponic herb garden? Not at all. You can start with as little as $20 for a basic mason jar Kratky setup. You can even build a complete DWC bucket setup for under $50.
Q: Can I use tap water in my hydroponic system? Yes, but let it sit out for 24 hours first so the chlorine can evaporate. If your tap water is very chlorinated, consider a simple filter or use pH-adjusted bottled water.
Q: How long does it take to grow herbs hydroponically? Herbs are typically ready to harvest in 3–6 weeks from seed. In a well-run DWC setup, basil can be ready in as little as 3 weeks.
Q: How do hydroponic herbs taste compared to soil-grown herbs? Many growers say hydroponic herbs taste just as good — and sometimes better — because the plant directs most of its energy toward leaf production rather than root growth.
Q: How often do I need to replace the water in my system? For small systems like mason jars, top off with fresh water weekly and do a full change every 2–3 weeks. For larger systems, replace water every 2 weeks or when nutrient levels drop significantly.
Q: Can I grow hydroponic herbs outdoors? Absolutely. Tower gardens and NFT systems work great on patios and balconies. Just protect them from heavy rain, which can dilute your nutrient solution.
Q: Is hydroponics safe for edible plants? Yes, completely. As long as you use food-safe containers and hydroponic-grade nutrients (not fertilizers made for lawns), your herbs are perfectly safe to eat.
Conclusion — Choose Your Setup and Get Growing
The best part about these 5 easy hydroponic herbs setup ideas is that there’s something for virtually every skill level, space and budget.
If you are just starting out, begin with a few mason jars and the Kratky method. It’s nearly free and will get you the fundamentals quickly. When you’re ready, step up to a DWC bucket or NFT pipe system for bigger yields.
Whatever setup you go for, the payoff is the same — fresh, flavorful herbs growing right where you need them, any time of year.
There is something deeply satisfying about snipping fresh basil from a plant you grew yourself in a jar of water sitting on your windowsill. No soil. No digging. No trips to the grocery store for overpriced packets of herbs that will turn brown within three days.
Hydroponics puts you in control. And once you get going, it’s difficult to stop at just herbs.
Two Week Challenge: Start small, stay curious and grow something great.