Planting your own plants at home sounds pretty amazing, right? Fresh basil for your pasta. Mint for your drinks. Cilantro, all set for when you need it.
But here’s the thing: Most people attempt to grow herbs in soil and end up with wilted, patchy plants that barely make it. The good news? There is a smarter way to do it.
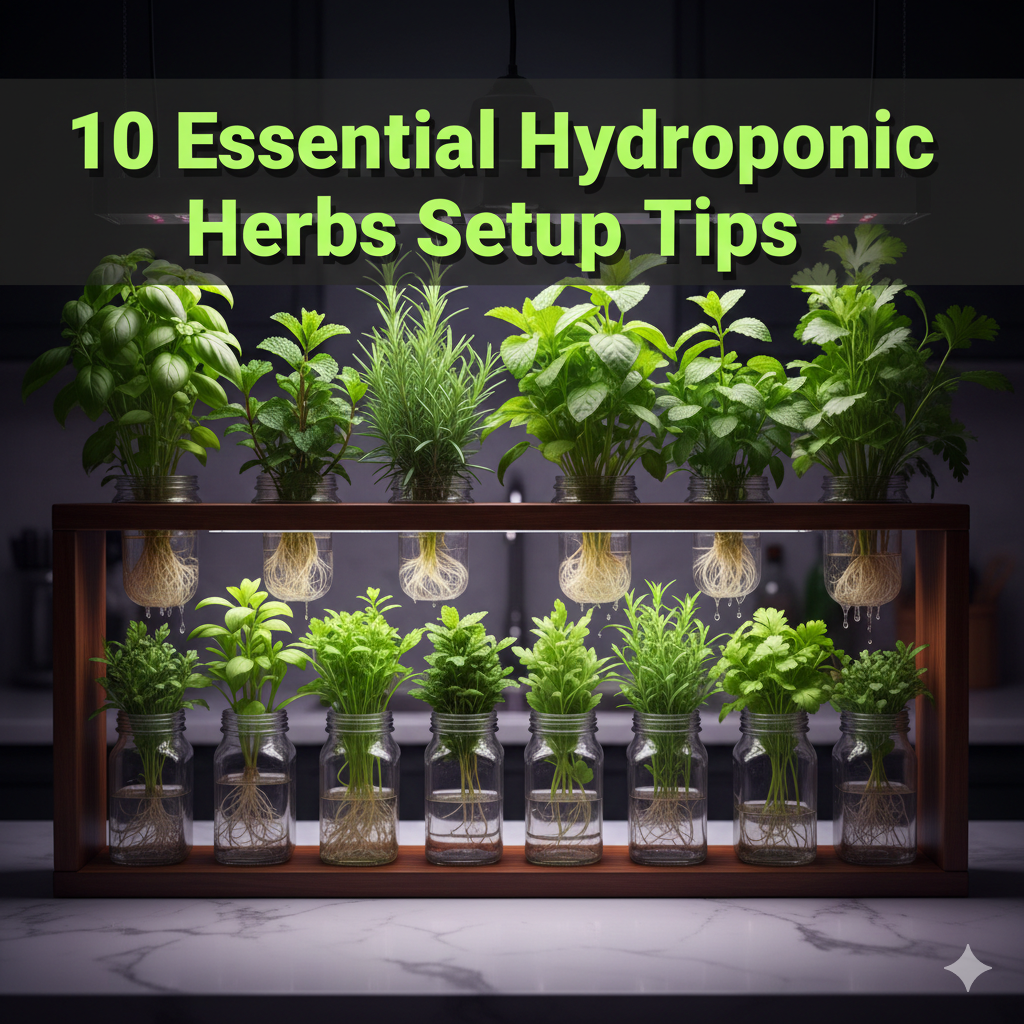
Hydroponic herb growing is a method that bypasses soil completely, as this approach allows plants to grow directly in nutrients and water. The result is faster growth, bigger yields, and herbs that actually taste amazing.
Whether you’re brand new to gardening or have some indoor gardening experience already, this guide gives you 10 practical, proven tips for getting your hydroponic herb garden set up correctly from day one.
So let’s dig in — minus the dirt.
Why Herbs Love Hydroponics So Much
Before we get into the tips, it’s helpful to know why this approach is a real game-changer for growing your own herbs indoors.
Plant roots in a soil garden burn a considerable amount of energy looking for water and nutrients. Hydroponics delivers those nutrients to the roots directly. Less work for the plant translates into more energy directed toward growing leaves — that is, the part of the herb you want.
Hydroponic plants grow faster than soil-based plants — according to studies, up to 50% faster. For herbs in particular, that translates to faster harvests, tastier leaves, and a steady supply — no waiting weeks for something to show up.
And you can do all this indoors, in a small apartment, on a countertop, or in a closet. If you’re just getting started and want to explore more about growing herbs at home, The Herb Garden is a fantastic resource packed with beginner-friendly guides and tips.
Tip #1 — Select the Right Herbs From Day 1
Not all herbs perform equally well in a hydroponic system. Some love it. Others can be a bit tricky.
Best Herbs to Grow Hydroponically
| Herb | Difficulty Level | Days to First Harvest | Best For |
|---|---|---|---|
| Basil | Easy | 25–30 days | Cooking, pesto |
| Mint | Easy | 20–25 days | Drinks, salads |
| Lettuce Leaf Basil | Easy | 28 days | Salads, garnish |
| Cilantro | Medium | 30–40 days | Mexican, Asian cuisine |
| Parsley | Medium | 35–45 days | Cooking, garnish |
| Chives | Easy | 30 days | Soups, dips |
| Oregano | Medium | 40–50 days | Italian dishes |
| Thyme | Medium | 40–55 days | Roasting, marinades |
| Dill | Medium | 40 days | Pickling, fish dishes |
| Watercress | Easy | 20 days | Salads, sandwiches |
If you’ve never grown hydroponic herbs before, start with basil, mint, or chives. They are forgiving and grow fast, which gives you quick wins that build confidence.
Tip #2 — Select a Hydroponic System That Suits Your Space
There’s no one “best” hydroponic system. The right one for you depends on your budget, how much room you have, and how many herbs you want to grow.
The Most Common Systems for Herbs
Deep Water Culture (DWC) is among the simplest. Plants rest in net pots with their roots suspended into a reservoir of nutrient-rich water. Oxygen in the water is ensured by an air pump. It’s an affordable option and great for beginners.
The Kratky Method is even more straightforward — it’s just DWC without the air pump. You fill a container, put the plants in, and they grow. No electricity needed. Ideal for small quantities of herbs.
Nutrient Film Technique (NFT) uses a thin film of nutrient solution that flows over the roots. It’s efficient and can help you grow several herbs at once, but it requires a little more setup.
Ebb and Flow (Flood and Drain) periodically floods the growing tray with nutrients, then drains it. Good for larger setups but more complex to manage.
If you are setting up a hydroponic herb garden in your home as a beginner, go with either DWC or the Kratky method. They’re low-tech, low-maintenance, and surprisingly effective.
Tip #3 — Know Your Nutrient Solution
That’s where many beginners go wrong. Herbs require a balanced nutrient mix to thrive. Too little and they look pale and puny. Too much and you’ll scorch the roots.
The Three Key Nutrients for Herbs
Nitrogen (N) promotes leafy green growth. Since you are growing herbs for their leaves, nitrogen is important.
Phosphorus (P) supports strong root development. Better roots help to better absorb nutrients.
Potassium (K) provides overall plant health, disease resistance, and flavor.
Hydroponic nutrient solutions usually come as either liquid concentrates or dry powders. Seek out formulas aimed specifically at leafy greens and herbs — these are typically higher in nitrogen.
Your pH Levels Are More Important Than You Realize
For herbs to absorb those nutrients, your nutrient solution must be within the correct pH range. When the pH gets out of whack, nutrients are “locked out” — that is to say, they’re present in the water but the plant cannot make use of them.
| Herb | Ideal pH Range |
|---|---|
| Basil | 5.5 – 6.5 |
| Mint | 5.5 – 6.0 |
| Cilantro | 6.0 – 6.7 |
| Parsley | 5.5 – 6.0 |
| Chives | 6.0 – 6.5 |
| Oregano | 6.0 – 7.0 |
| Thyme | 5.5 – 7.0 |
Pick up a basic pH meter or test strips. Adjust with pH Up or pH Down solutions as needed. Check your pH at least every two to three days.
Tip #4 — Light Is Everything — Don’t Underestimate It
Plants can’t photosynthesize without light. And indoors, natural light is often not enough — particularly in winter or if your space doesn’t get direct sun.
How Much Light Do Hydroponic Herbs Require?
Most herbs will require around 14 to 16 hours of light a day to grow strong and flavorful. Without enough light, your herbs will grow tall and spindly — a condition known as “etiolation” — and the flavor will be compromised.
Choosing the Right Grow Light
LED grow lights are the gold standard for home hydroponic setups. They’re energy-efficient, don’t produce too much heat, and have a long lifespan.
T5 fluorescent lights are a good budget option. They work well with herbs and are commonly available.
Full-spectrum LEDs covering both blue and red wavelengths are ideal. Blue light promotes leafy growth; red light stimulates overall plant development.
A simple timer works wonders here. Set your lights to turn on and off so your herbs get a consistent light cycle every single day. This small step makes a huge difference.
Tip #5 — Get the Water Temperature and Oxygen Levels Right
Water quality goes beyond pH. Root health is heavily influenced by temperature and oxygen content.
Keep Water Temperature in the Sweet Spot
Most hydroponic herbs prefer water temperatures between 65°F and 72°F (18°C to 22°C). Warmer water holds less oxygen and creates ideal conditions for root rot. Cooler water slows down nutrient absorption.
If your system runs warm, you may want to wrap your reservoir in insulating material or use a compact aquarium water chiller.
Oxygenate Your Water
Roots need oxygen just as much as they need nutrients. In DWC systems, an air pump with an air stone — similar to those found in fish tanks — keeps the water bubbling with oxygen.
Roots become slimy, brown, and unusable without adequate oxygenation. This is one of the most common causes of hydroponic failure — and one of the easiest to prevent.
Tip #6 — Use the Right Growing Medium
Even though hydroponics doesn’t use soil, most systems still use a growing medium to anchor the plant and support the roots.
Top Growing Mediums for Hydroponic Herb Setups
Rockwool is one of the most popular choices for new growers. It retains moisture well and is easy to use. Simply soak it in pH-adjusted water before use.
Clay pebbles (LECA) are reusable, drain well, and provide excellent aeration. Rinse them thoroughly before use.
Perlite is lightweight and perfect for small herb setups. It mixes well with other mediums.
Coco coir is derived from coconut husks and holds moisture while still allowing airflow. It’s a more natural option.
Do not use regular garden soil or potting mix in a hydroponic system. It clogs the system and introduces pests and diseases.
Tip #7 — Space Your Plants the Right Way
Crowded plants compete for light and nutrients. Allow enough room for each herb to grow and flourish.
Recommended Plant Spacing for Common Herbs
| Herb | Minimum Spacing |
|---|---|
| Basil | 6–8 inches |
| Mint | 4–6 inches |
| Cilantro | 3–4 inches |
| Chives | 2–3 inches |
| Parsley | 4–6 inches |
| Oregano | 6–8 inches |
| Thyme | 6–8 inches |
Airflow decreases when plants grow too close together. That creates humidity around the leaves, which can cause mold and fungal problems. Good spacing = healthier plants.
Also rotate your plants every few days if they’re reaching toward a light source. This keeps growth even and consistent.
Tip #8 — Keep Harvesting to Promote More Growth
Here’s something that shocks many first-time hydroponic growers: the more you harvest, the more your herbs grow.
Most herbs are what gardeners refer to as “cut and come again” plants. When you prune them consistently, they respond by putting out new growth to replace what was removed. Many herbs, if left alone too long, will bolt — meaning they expend all their energy flowering and seeding instead of producing leaves.
How to Harvest Herbs Without Damaging the Plant
For basil, pinch the top two to four leaves. Always cut just above a leaf node. Never remove more than a third of the plant at once.
For mint, cut stems from the top. Mint is a vigorous grower, so regular trimming prevents it from taking over.
For chives, snip the leaves down to about one inch above the base. They’ll regrow quickly.
For cilantro, pick off the outer leaves first before moving inward.
Harvest in the morning if possible. That’s when the essential oils in the leaves are at their most concentrated — which means better flavor.
Tip #9 — Keep Pests and Disease Away From Your Setup
One of the top benefits of hydroponic herb growing is that it naturally reduces many common pest and disease problems. No soil means no soil-borne pests. But that doesn’t mean you’re completely off the hook.
Common Pests in Hydroponic Herb Gardens
Aphids are small insects that gather on leaves and suck the juice out of plants. They spread fast. Inspect the undersides of leaves frequently.
Fungus gnats are drawn to moist growing mediums. They are mostly a nuisance, but their larvae can damage roots.
Spider mites flourish in warm, dry conditions. They leave tiny speckles on leaves and fine webs around stems.
Prevention Is Always Better Than Cure
Keep your grow area clean and dry. Wipe down surfaces regularly. Ensure your plants have sufficient airflow — a small nearby fan works perfectly.
According to the University of California’s Integrated Pest Management Program, neem oil spray is one of the safest and most effective organic treatments available for home herb gardens. Mix a small amount in water with a drop of dish soap, then spray the affected plants.
Avoid harsh chemical pesticides on herbs you plan to eat.
Tip #10 — Track, Adjust, and Keep Learning
The best hydroponic herb growers are the ones who pay attention. A quick daily check-in goes a long way toward catching problems before they spiral.
What to Check Every Day
- Water level — top up with plain, pH-adjusted water as needed
- pH — stay within your target range
- Plant appearance — yellowing leaves, wilting, or spots can signal a problem
- Light — ensure all plants are receiving sufficient coverage
- Root health — healthy roots are white and bushy; brown or slimy roots need attention
Keep a Simple Garden Journal
You don’t need anything fancy. A basic notebook or a notes app on your phone works perfectly. Track things like when you started each herb, when you changed the nutrient solution, what pH readings you recorded, and when you harvested.
This data becomes incredibly valuable over time. You’ll start to see patterns — which herbs grow best in your setup, what nutrient ratios yield the tastiest flavor, and how long each harvest cycle really takes.
Growing is a skill. And you get better at it every season.
Quick-Reference Setup Checklist
Here is a simple checklist to help you get your hydroponic herb garden up and running:
| Step | Task | Done? |
|---|---|---|
| 1 | Choose 2–3 beginner-friendly herbs | ☐ |
| 2 | Select a hydroponic system (DWC or Kratky recommended) | ☐ |
| 3 | Buy a quality nutrient solution for leafy greens | ☐ |
| 4 | Get a pH meter and pH adjustment solutions | ☐ |
| 5 | Set up a full-spectrum LED grow light with a timer | ☐ |
| 6 | Choose a suitable growing medium (clay pebbles or rockwool) | ☐ |
| 7 | Set up air pump and air stone for DWC | ☐ |
| 8 | Monitor water temperature | ☐ |
| 9 | Space plants correctly and rotate regularly | ☐ |
| 10 | Start a garden journal to track progress | ☐ |
FAQs About Hydroponic Herb Setups
Q1: What’s the lowest amount I can spend to start a hydroponic herb garden? Absolutely. A basic Kratky setup can be created with just a mason jar, some net cups, nutrient solution, and a grow light — all for less than $50. It’s one of the easiest and most affordable ways to begin.
Q2: Do hydroponic herbs taste as good as soil-grown herbs? Most growers find their hydroponic herbs taste even better. Because the plant receives exactly the nutrients it needs without stress from poor soil conditions, flavor and aroma tend to be stronger and more consistent.
Q3: How often should I change the nutrient solution? A full reservoir change is recommended every one to two weeks. Between changes, top off with plain pH-adjusted water as levels drop. This prevents nutrient buildup and keeps things fresh.
Q4: Can I grow hydroponic herbs without a grow light? You can, if your space enjoys a minimum of 6 to 8 hours of direct natural sunlight daily. Most indoor spaces fall far short of offering consistent light, especially in winter. A grow light is almost always worth the investment.
Q5: What is the simplest hydroponic method for first-timers? The Kratky method is hands-down the simplest. No pumps, no electricity for water movement, no complicated timers. Just water, nutrients, and light. It’s really useful for learning the basics before scaling up.
Q6: How can I tell if my herbs have a nutrient deficiency? Watch the leaves closely. Yellowing leaves often signal nitrogen deficiency. Purple-tinged leaves may indicate a phosphorus problem. Brown leaf edges can point to potassium issues or pH imbalances. When in doubt, check your pH first — it’s the most frequent offender.
Q7: Are herbs grown hydroponically safe to eat? Yes, completely. Hydroponically-grown herbs are perfectly safe and healthy to eat, as long as you’re using food-safe nutrient solutions and maintaining a clean system. Many commercial grocery store herbs are already grown this way.
Wrapping It All Up
If you know what needs to be done, setting up a hydroponic herb garden is not difficult at all. The key is to keep things simple, focus on the fundamentals — light, nutrients, pH, and water quality — and build from there.
No big space, no budget-busting costs, and certainly not years of gardening experience required. What you do need is some patience and the desire to learn as you go.
Start with two or three herbs. Get comfortable with your system. Harvest regularly. Adjust when something isn’t working. And before long you’ll have a countertop full of fresh, lively herbs that you grew yourself — without a single handful of dirt.
That’s the real magic of this hydroponic herb setup. Once you experience it, you won’t want to go back.