Have you ever heard of growing herbs without soil? Most people haven’t. However, hydroponic herbage is in the making — and not in the distant future, but in kitchens, garages, apartments, and yards throughout the world.
Best of all, you don’t have to know about gardening. Instead, you need the proper tricks.
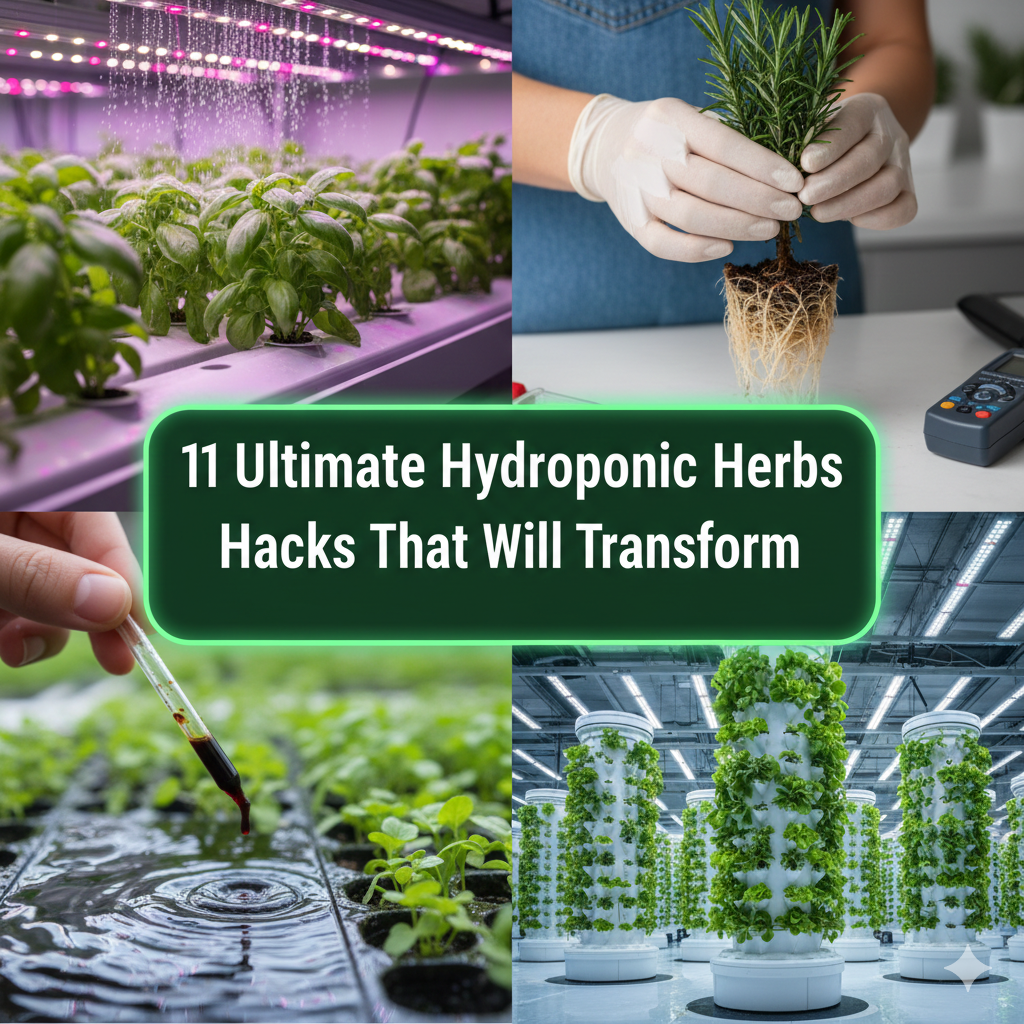
Whether you’re just getting started or have a system in place, the following 11 hydroponic herbs hacks will help you to a faster, healthier, and smarter crop. You’re about to take your herb game to the next level.
What’s the Point of Getting Hyped About Hydroponic Herbs?
Before you start exploring the herb bins, let’s clarify why hydroponics is such a big opportunity for herb growers.
The plant uses a substantial proportion of its energy to find nutrients and water when you cultivate herbage in the field. In a hydroponic setup, the nutrients a plant needs move straight to the roots. The preserved energy is then expended on producing leaves — exactly what you want from herbage.
Shall we compare:
| Feature | Soil | Hydroponic |
|---|---|---|
| Growth Speed | Natural | Up to 50% faster |
| Water Usage | High | Almost 90% less |
| Space Needed | More | Much less |
| Pest Risk | Higher | Noticeably less |
| Growing Season | Seasonal | Year-round |
That’s a compelling case. So, let’s get into the hacks.
Hack #1 — Choose the Correct Herbs From the Start
Not all herbs are created equally. Certain herbs prosper. Starting with the incorrect herbs is a popular novice error. It could encourage unfavorable outcomes and prompt early disappointment.
The Herbs That Perform Best in Hydroponic Systems
- Basil — Quick growing, warm water temp lover, abundant producer
- Mint — Fast spreader, very low maintenance
- Cilantro — Would rather have cool temperatures; grows well in NFT systems
- Chives — Will grow in low light, hardy and forgiving
- Parsley — Steady grower, performs well in DWC systems
- Oregano — Roots love dry conditions; best in wick or aeroponic systems
If you’re just beginning, start with basil or mint. They grow quickly and provide you with quick wins that keep you motivated.
Hack #2 — Master Your Nutrient Solution
Your nutrient solution is essentially your plant’s food. Get it wrong and no amount of other good work will save your herbs.
Herbs primarily require three nutrients: nitrogen (N), phosphorus (P), and potassium (K). These are expressed as NPK ratios on nutrient bottles.
Simple NPK Guide for Herbs
| Growth Stage | What Herb Needs | Best NPK Ratio |
|---|---|---|
| Seedling | Root development | 2-1-1 |
| Vegetative (leafy growth) | High nitrogen level | 3-1-2 |
| Mature herb | Balanced feed | 1-1-1 |
A higher nitrogen ratio is your best friend for most herbs. Nitrogen fuels leafy, green growth — and with herbs, that is the entire point.
Quick tip: Always mix your nutrient solution in plain water before adding it to your system. Do not combine concentrates together before dilution — it can trigger chemical reactions that block nutrients.
Replace your nutrient solution every 7–14 days. Don’t let it sit too long — it goes stale and out of balance.
Hack #3 — Place Your pH Into the Sweet Spot
pH is one of those things that seems technical but is really simple once you understand it.
pH tells you the acidity or alkalinity of your water. It operates on a scale of 0 to 14. Seven is neutral. Below 7 is acidic. Above 7 is alkaline.
Most hydroponic herbs prefer the pH to be within a range of 5.5 – 6.5.
Anything outside of that range means your plant is unable to absorb nutrients properly — even if those nutrients are present in the water. This is known as nutrient lockout, and it can be particularly sneaky because the problem appears to be a deficiency, despite having fed the plant properly.
Quick pH Cheat Sheet
| Herb | Ideal pH Range |
|---|---|
| Basil | 5.5 – 6.5 |
| Mint | 5.5 – 6.0 |
| Cilantro | 6.0 – 6.5 |
| Parsley | 5.5 – 6.0 |
| Chives | 6.0 – 6.5 |
| Oregano | 6.0 – 7.0 |
Test your pH every 2–3 days. Use a digital pH meter — cheap, accurate and worth every penny. Liquid test kits also work but take longer.
Use pH-up (potassium hydroxide) or pH-down (phosphoric acid) solutions to adjust pH. Add small amounts at a time and retest.
Hack #4 — Select the Optimal Growing Medium
With hydroponics, there is no soil. But plants still require something to hold down their roots. That is where growing mediums come into play.
The growing medium keeps the plant anchored and provides moisture and oxygen to the roots.
Top Growing Mediums for Herbs
Hydroton (clay pebbles) — The most popular choice. Great drainage, reusable and root friendly. Ideal for basil, mint and parsley.
Rockwool — Great for germinating seeds and clones. Holds moisture really well. Can raise pH, so always pre-soak in pH-adjusted water.
Coco coir — Made from coconut husks. Excellent water retention. Works great in wick and drip systems.
Perlite — Lightweight, great aeration. Often mixed with coco coir for a balanced medium.
The hack here? Match your growing medium to your system type. Clay pebbles are great for flood and drain or DWC. Rockwool pairs perfectly with NFT systems. Coco coir excels in drip systems.
Hack #5 — Do Your Lighting Right (On a Budget)
Light is everything for herbs. Too little and they become leggy and weak. Too much and they can bleach or burn.
Most herbs require 14–16 hours of light per day in a hydroponic setup.
Best Lights for Hydroponic Herbs
LED grow lights are the current best choice. They’re energy-efficient, generate less heat, and emit the full spectrum your plants require. A good quality LED panel can last for 50,000+ hours.
Fluorescent T5 lights are inexpensive and a great choice for herbs that don’t require intense light. Perfect for chives, parsley, and mint.
Full-spectrum LEDs are best if you’re growing basil or other light-hungry herbs indoors year-round.
Light Distance Guide
| Light Type | Distance From Plants |
|---|---|
| T5 Fluorescent | 4 – 6 inches |
| LED Grow Light | 12 – 24 inches |
| HID / Metal Halide | 18 – 24 inches |
The hack? Use a timer. Set it and forget it. Consistent light cycles keep herbs in vegetative mode, producing maximum leaf growth. Irregular light schedules stress plants and slow growth.
Hack #6 — Be the Boss of Your Water Temperature
Water temperature is often overlooked by most beginners. And it costs them big.
The ideal water temperature for hydroponic herbs is 65°F to 72°F (18°C to 22°C).
Warm water holds less oxygen. Less oxygen at the roots means slower growth and a greater disease risk — particularly root rot.
Signs Your Water Is Too Warm
- Slimy, brown, or mushy roots
- Slow or stunted growth
- Foul smell from the reservoir
- Yellowing lower leaves
The hack: Use an aquarium thermometer to check your water temperature every morning. If your reservoir runs warm, try:
- Placing it in a cooler area
- Wrapping it in reflective insulation
- Using a small aquarium chiller for bigger systems
- Adding a frozen bottle of water to the reservoir as a short-term solution
Cold water = more dissolved oxygen = happier, faster-growing herbs. It’s that simple.
Hack #7 — Prune Smarter, Not Harder
Pruning isn’t only for controlling the space your herbs take up. When done correctly, it stimulates faster, bushier growth.
If you cut the right places, the plant sends out two new branches instead of one. You end up with double the harvest points.
The Golden Pruning Rules for Hydroponic Herbs
Rule 1: Always make your cuts just above a leaf node (the place where leaves branch off the stem).
Rule 2: Do not take more than one-third of the plant in a single go. Over-pruning stresses plants and slows growth.
Rule 3: Keep your scissors clean and sharp. Dirty or blunt tools cause crushing and spread disease.
Rule 4: Pick from the top of the plant first. This allows lower leaves to get light and drives upward growth.
Basil hack specifically: Snip off the flower buds as soon as you notice them. Once basil bolts (flowers), the leaves become bitter and growth slows significantly. Prevent it from flowering and it’ll continue to produce new leaves for months.
Hack #8 — Oxygen Is Your Secret Weapon
Most people think about nutrients and light. But oxygen at the root zone is just as important — perhaps more so.
Roots require oxygen to properly absorb nutrients. Roots that go without oxygen are slow and disease-prone.
Two Ways to Boost Root Oxygen
Air stones and air pumps — These inexpensive aquarium accessories bubble air through your water. More bubbles mean higher dissolved oxygen. A must-have for DWC (Deep Water Culture) setups.
Hydrogen peroxide (H2O2) — Adding about 2.5ml per gallon of 3% food-grade hydrogen peroxide to your reservoir provides an instant oxygen boost and kills off harmful bacteria. Use sparingly and only as needed.
Keep your reservoir dark too. Light hitting the water promotes algae growth, which competes with your herbs for oxygen and nutrients. Use a dark-colored or opaque reservoir — or wrap a clear one in black duct tape or foil.
Hack #9 — Deterring Bugs Without Chemicals
One of the greatest benefits of hydroponics is fewer pests. But “fewer” doesn’t mean “none.”
Fungus gnats, spider mites, and aphids are the most common pests found in hydroponic herb setups.
Prevention Is 10x Easier Than Treatment
Keep humidity in check. Fungus gnats and mold flourish in high humidity. Aim for 40–60% relative humidity. Use a small fan to keep air circulating.
Inspect weekly. Check the undersides of leaves. Pests hide there. Catching an infestation early makes it 10 times easier to deal with.
Use yellow sticky traps. Hang them near your plants. They snare flying pests before populations explode.
Neem oil spray — If you do get pests, a diluted neem oil solution sprayed on leaves (not into the reservoir) manages most soft-bodied insects safely and naturally.
Root zone hack: Beneficial bacteria products such as Hydroguard contain bacillus bacteria that protect roots from pythium (root rot) naturally. Add it to the reservoir as a precaution — especially in warmer conditions.
Hack #10 — Use the Right System for Each Herb
Different herbs have different preferences. Matching an herb to the right hydroponic system is a game-changer that most beginner guides skip over.
Quick System-to-Herb Matching Guide
| Hydroponic System | How It Works | Best Herbs |
|---|---|---|
| Deep Water Culture (DWC) | Roots dangle in oxygenated nutrient water | Basil, Mint, Lettuce |
| Kratky Method | Passive — no pump required | Chives, Lettuce, Herbs |
| NFT (Nutrient Film Technique) | Thin stream of water trickles over roots | Cilantro, Parsley, Basil |
| Ebb & Flow (Flood & Drain) | Timed flooding of root zone | Rosemary, Oregano, Thyme |
| Wick System | Passive wicking of nutrients | Lower moisture herbs |
| Aeroponics | Roots misted with nutrient solution | Mint, Basil, fast growers |
The hack: If you’re growing water-loving herbs like basil and mint, go DWC or Kratky. For Mediterranean herbs such as rosemary, thyme, or oregano — which prefer drier roots — choose ebb and flow or wick systems. Mismatching can cause root rot or stunted growth even when everything else is done right.
For even more in-depth growing guides, herb profiles, and gardening tips, check out The Herb Garden — a great resource for both beginner and experienced herb growers.
Hack #11 — Track Everything in a Simple Grow Journal
This one sounds boring. Stick with it — it’s one of the most powerful hacks on this list.
A grow journal allows you to notice patterns, diagnose issues quickly, and reproduce success.
You don’t need anything fancy. A notebook or a basic spreadsheet works just as well.
What to Track
- Date and herb variety planted
- pH and EC (electrical conductivity) readings every few days
- Water temperature
- Light hours per day
- Any changes to nutrient solution
- Observations of growth — new leaves, discoloration, pests
- Harvest dates and yields
After your first grow cycle, you’ll have data that will improve your second cycle immensely. After three or four cycles, you’ll have an exact playbook built on your own actual results — not someone else’s guesswork.
Digital bonus hack: Every 3–4 days, take a photo from the same angle and distance. Time-lapse your progress. You’ll be surprised by what you learn about your plants’ growth patterns — and it’s really enjoyable to watch.
Putting It All Together
Here’s an overview of all 11 hacks in one place:
| # | Hack | Quick Tip |
|---|---|---|
| 1 | Pick the right herbs | Start with basil or mint |
| 2 | Master your nutrients | Higher nitrogen for leafy growth |
| 3 | Get your pH right | Keep between 5.5–6.5 |
| 4 | Choose the right medium | Match medium to system type |
| 5 | Balance your lighting | 14–16 hours, use a timer |
| 6 | Control water temperature | 65–72°F for maximum oxygen |
| 7 | Prune smarter | Cut above leaf nodes only |
| 8 | Boost root oxygen | Air stones + dark reservoir |
| 9 | Prevent pests | Humidity control + weekly checks |
| 10 | Match system to herb | DWC for basil, ebb & flow for rosemary |
| 11 | Keep a grow journal | Track pH, temp, and harvest notes |
FAQs About Hydroponic Herbs
Q: How long do hydroponic herbs take to grow compared to soil? Herbs grown with a hydroponic system usually grow 30–50% faster than soil-grown herbs. For instance, basil only takes about 3–4 weeks to go from seed to harvest hydroponically, compared to 6–8 weeks in soil.
Q: Do hydroponic herbs taste the same as soil-grown herbs? Yes — and some gardeners say they taste even better. The controlled environment and direct delivery of nutrients typically results in more vibrant colors and aromas. Hydroponically-grown basil tends to be especially flavorful.
Q: What is the easiest hydroponic system for beginners? The simplest is the Kratky method. It’s entirely passive — no pumps, no timers, no power required. You simply fill a container, place your plant, and let it grow. Great for herbs such as lettuce, chives, and mint.
Q: How frequently do I need to change the nutrient solution? A good rule of thumb is every 7–14 days. Top off with plain pH-adjusted water as levels drop between changes. If pH becomes hard to stabilize or if you notice a strange smell, always do a full change.
Q: Can I grow hydroponic herbs without a grow light? Yes, if you have a very bright south-facing window receiving 6+ hours of direct sunlight per day. But for the vast majority of indoor setups, a grow light provides much more dependable and consistent results all year round.
Q: Is it expensive to get started with hydroponic herb gardening? You can get started for as little as $20–$50 using the Kratky method with simple supplies. More advanced systems such as DWC or NFT setups may cost $100–$300+ to set up, but they scale well and pay for themselves with consistent harvests.
Q: What does it mean if my hydroponic herb leaves are turning yellow? Yellowing is generally indicative of one of three things: nutrient deficiency, pH imbalance (which leads to nutrient lockout), or poor oxygen at the roots. Check your pH first — it fixes the problem more often than anything else.
Final Thoughts
Growing hydroponic herbs doesn’t have to be complicated.
Start simple. Pick one or two herbs. Nail your pH and nutrients. Give them the proper light and the proper system. Then pay attention and adjust.
These 11 hydroponic herbs hacks provide you with a concrete, practical roadmap — not just theory. Every single one is something you can act on today, whether you’re getting your first system running or improving a struggling crop.
The most important thing? Just start. All great hydroponic gardeners began with one plant and a lot of curiosity. Your harvest is waiting.